This Little Girl Gingerbread Purse will make any little girl swoon this Christmas. Make a few up for all the little girls on your list. She is sure to love it. You may also like this wooden baby teether to make for the baby on your list. This month I have invited my favorite bloggers to share handmade gift ideas every day! Be sure to follow along for a entire month of great ideas.
Happy Holidays, Skip to My Lou, readers! My name is Kyla and I’m creative mama over at Funky PolkaDot Giraffe! I’m a 2nd grade teacher turned stay-at-home mom. I keep busy creating for my site, juggling three kids, and trying to steal a moment for myself all while being a full-time mom taxi.
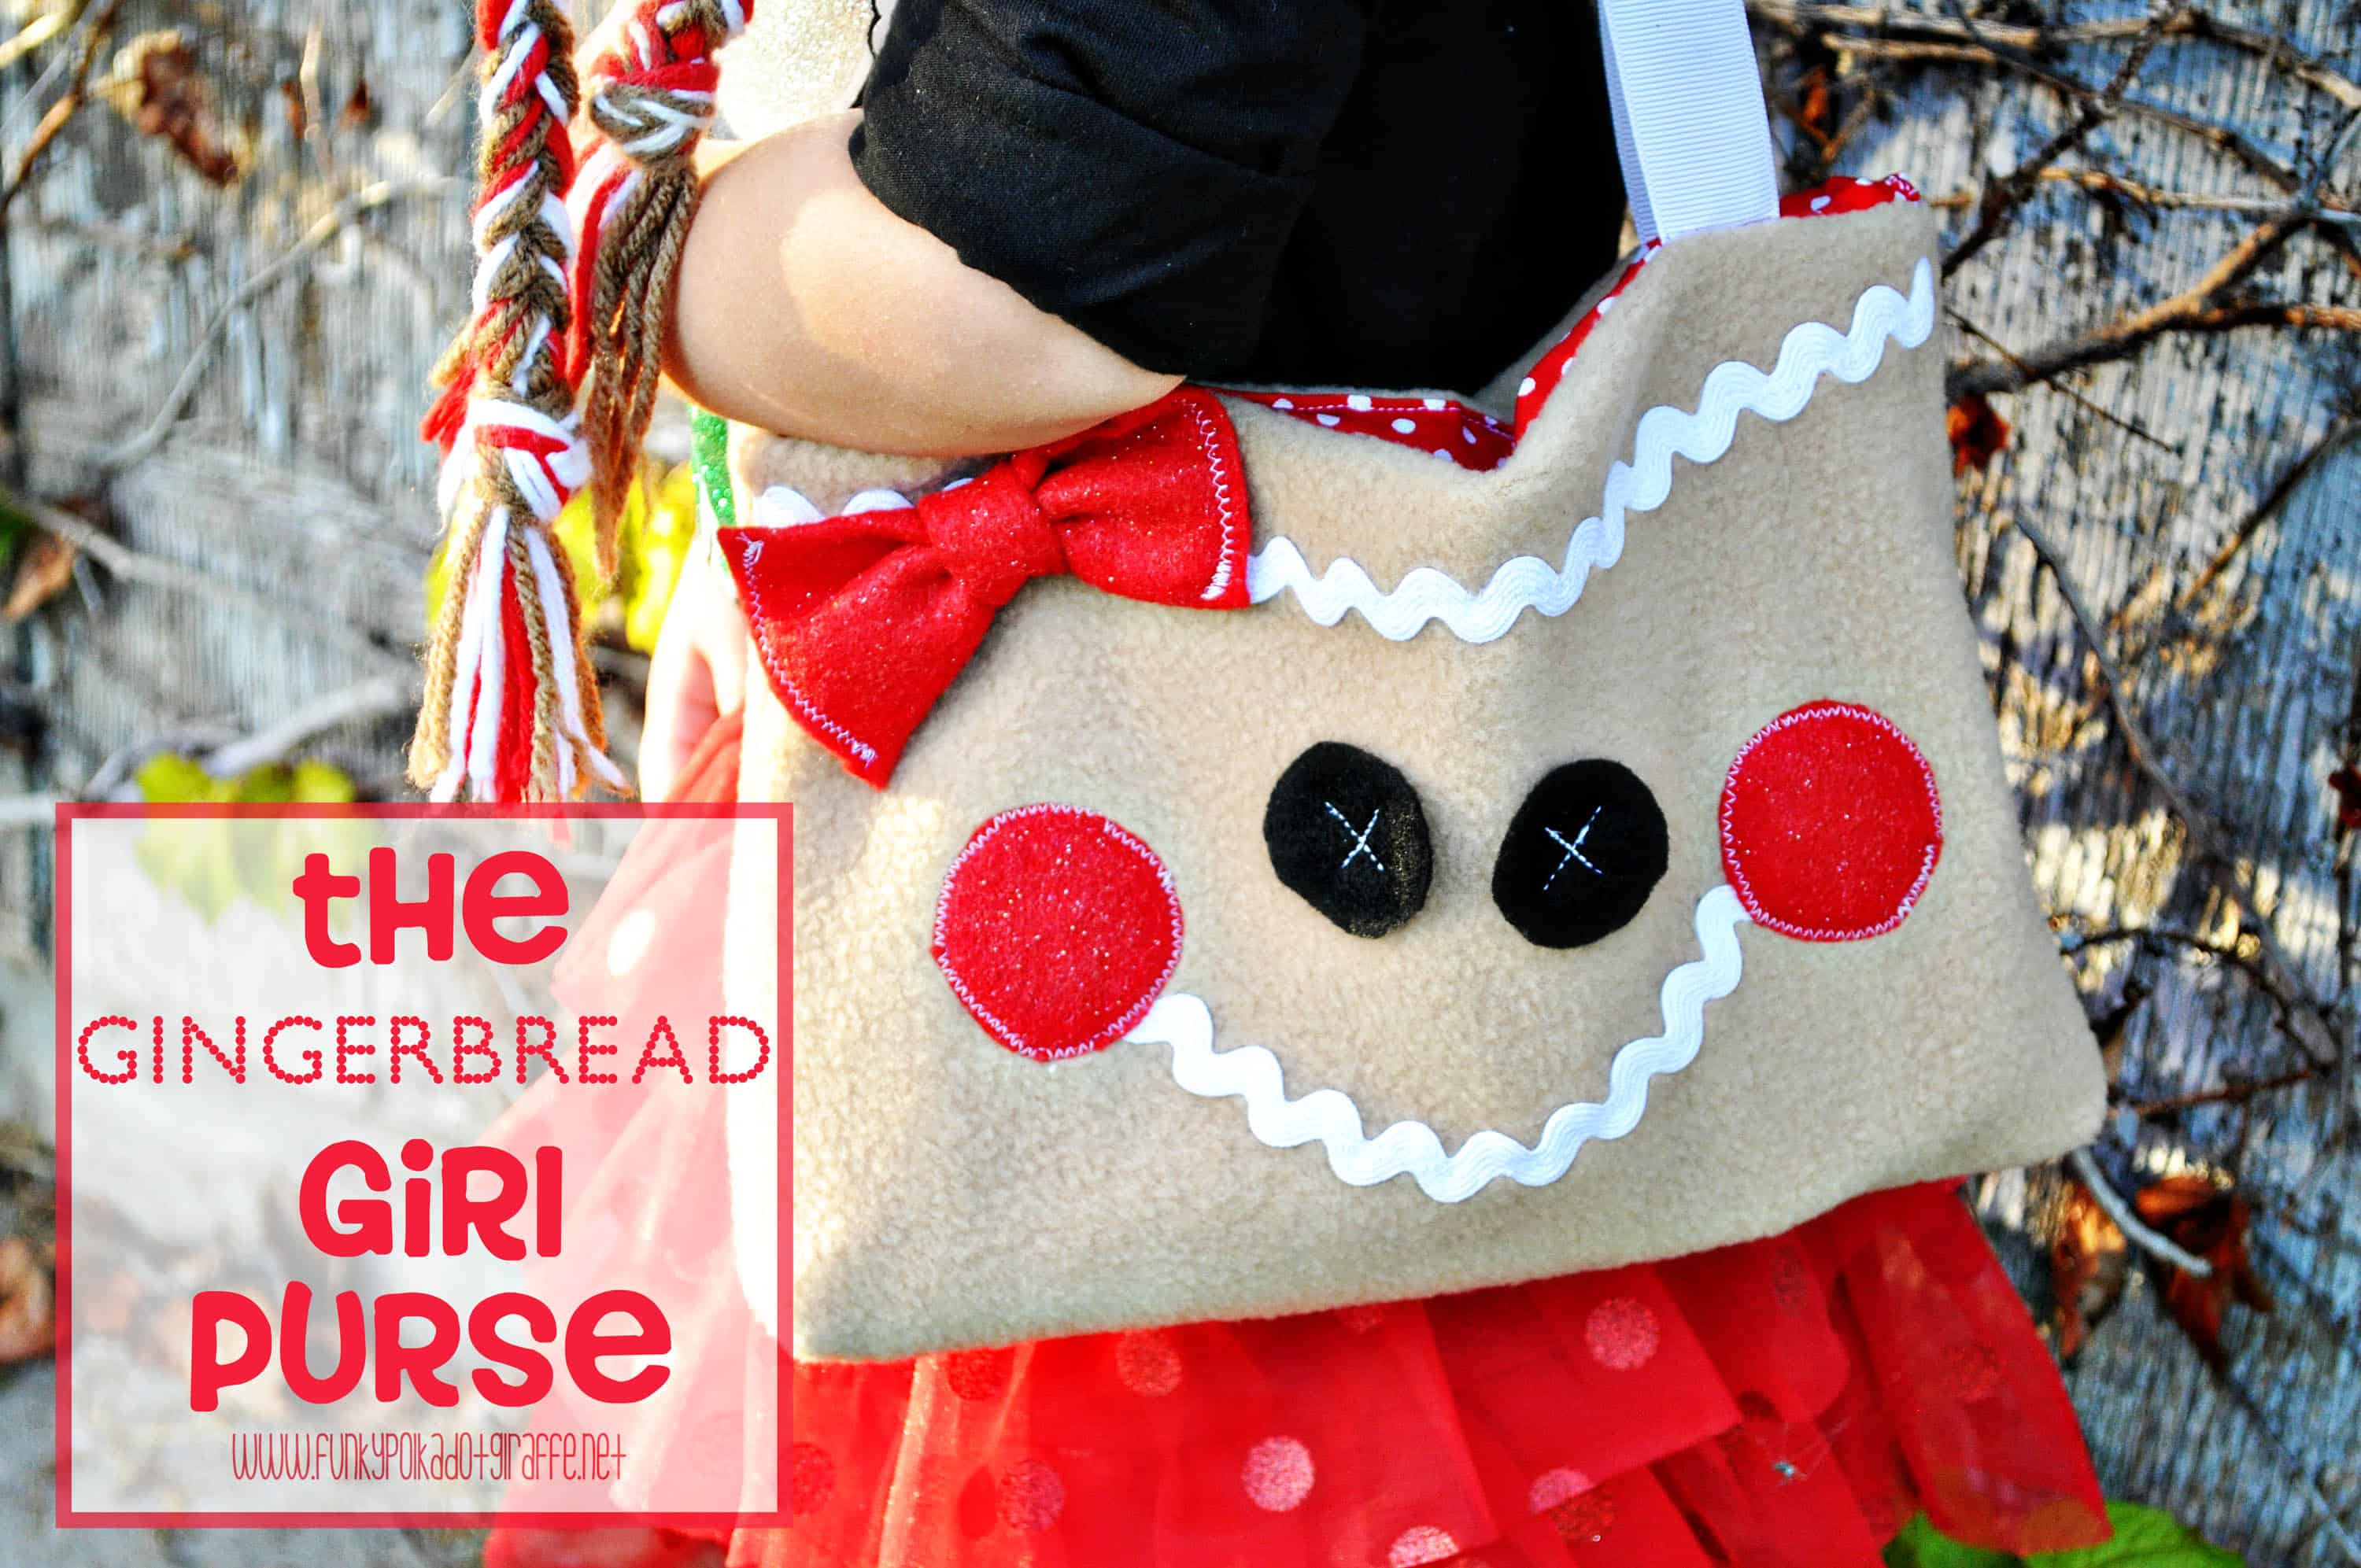
Last year my very talented mother-in-law made my little Grace an adorable crocheted gingerbread man beanie. She has recently become obsessed with purses and carrying all her little trinkets around with her. The weather finally feels like fall and we have pulled out the beanies and the hats for chilly carpool mornings. So, I decided to make her an adorable Gingerbread Girl Purse to match her cute hat.
This sweet little girl purse is made of soft fleece, a bit of felt, rick rack, some ribbon and cotton print fabric. The tote purse took me about an hour to put together. However, if you don’t have sewing ADHD, because you’re trying to watch the new Holiday Baking Challenge like me, then it could take you even less time.
SUPPLIES
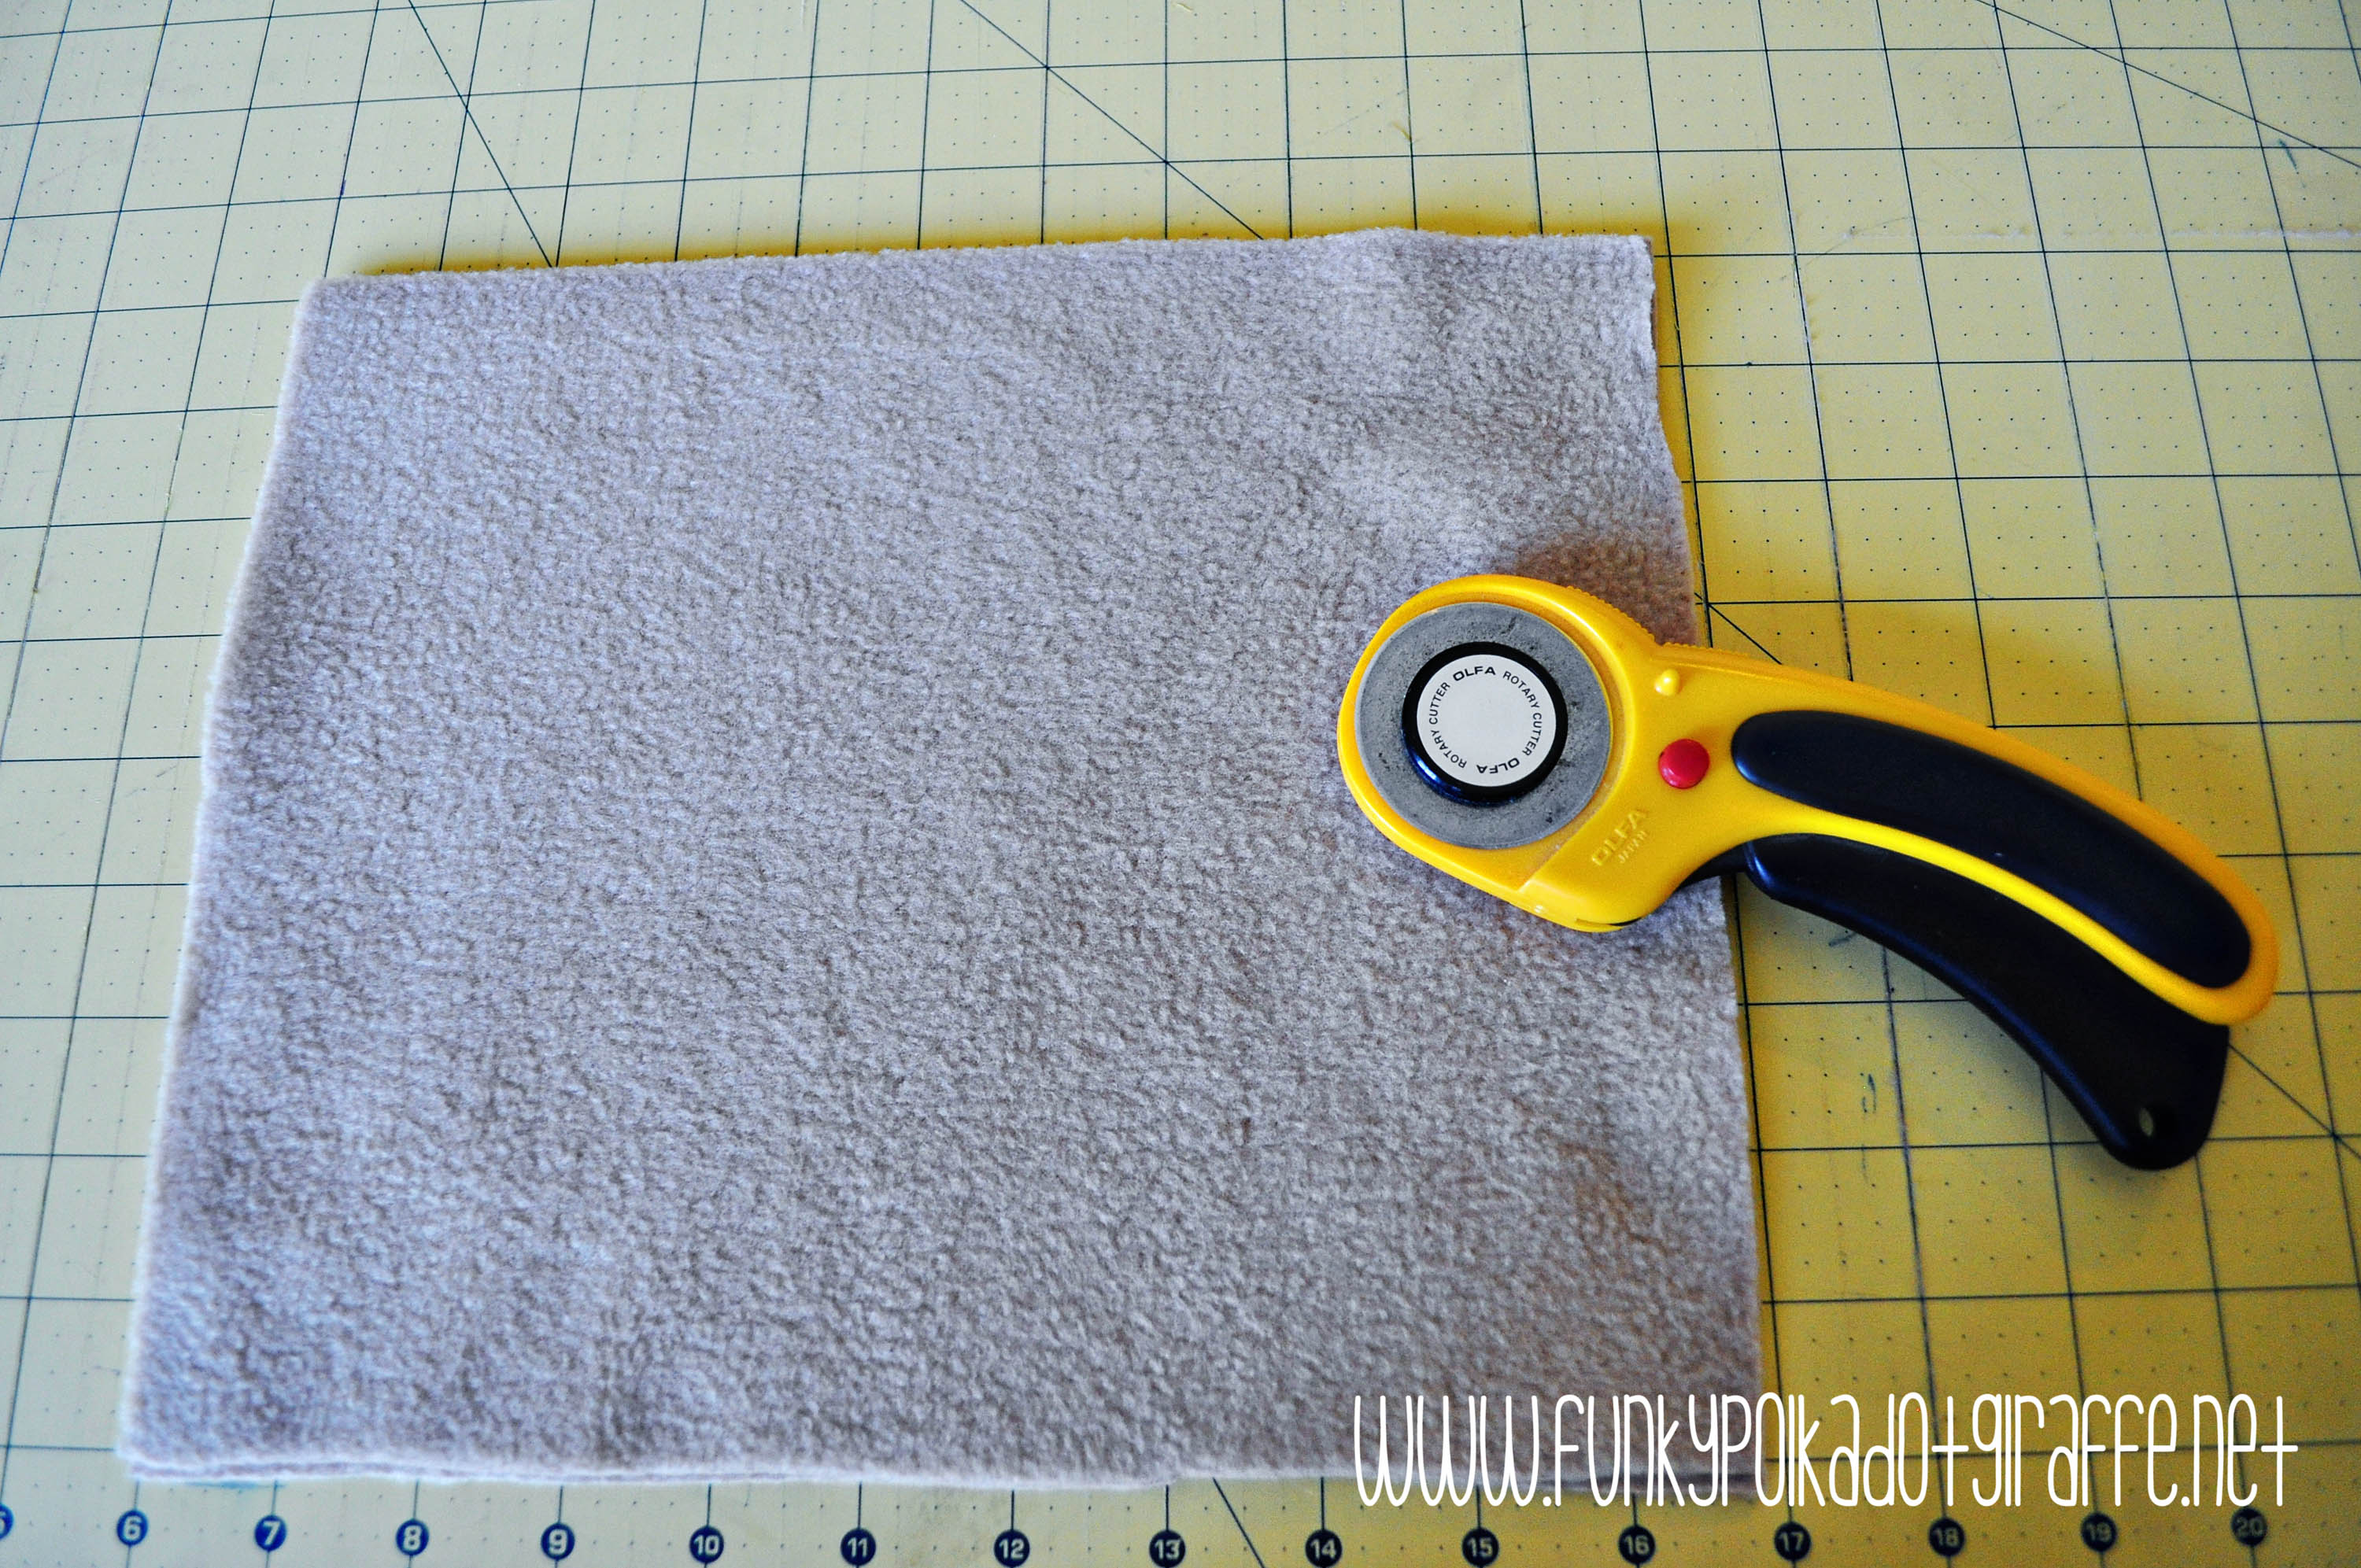
- 2 pieces of brown fleece cut to 9″x11″
- 2 pieces red cotton fabric cut to 9″x11″
- 2 pieces of 5/8″ white ribbon cut 16″ long
- scraps of black and red felt for eyes, cheeks, bow {optional}
- white ric-rac (about 12″)
- scissors
- sewing machine
- pins
- basting adhesive {optional}
DIRECTIONS
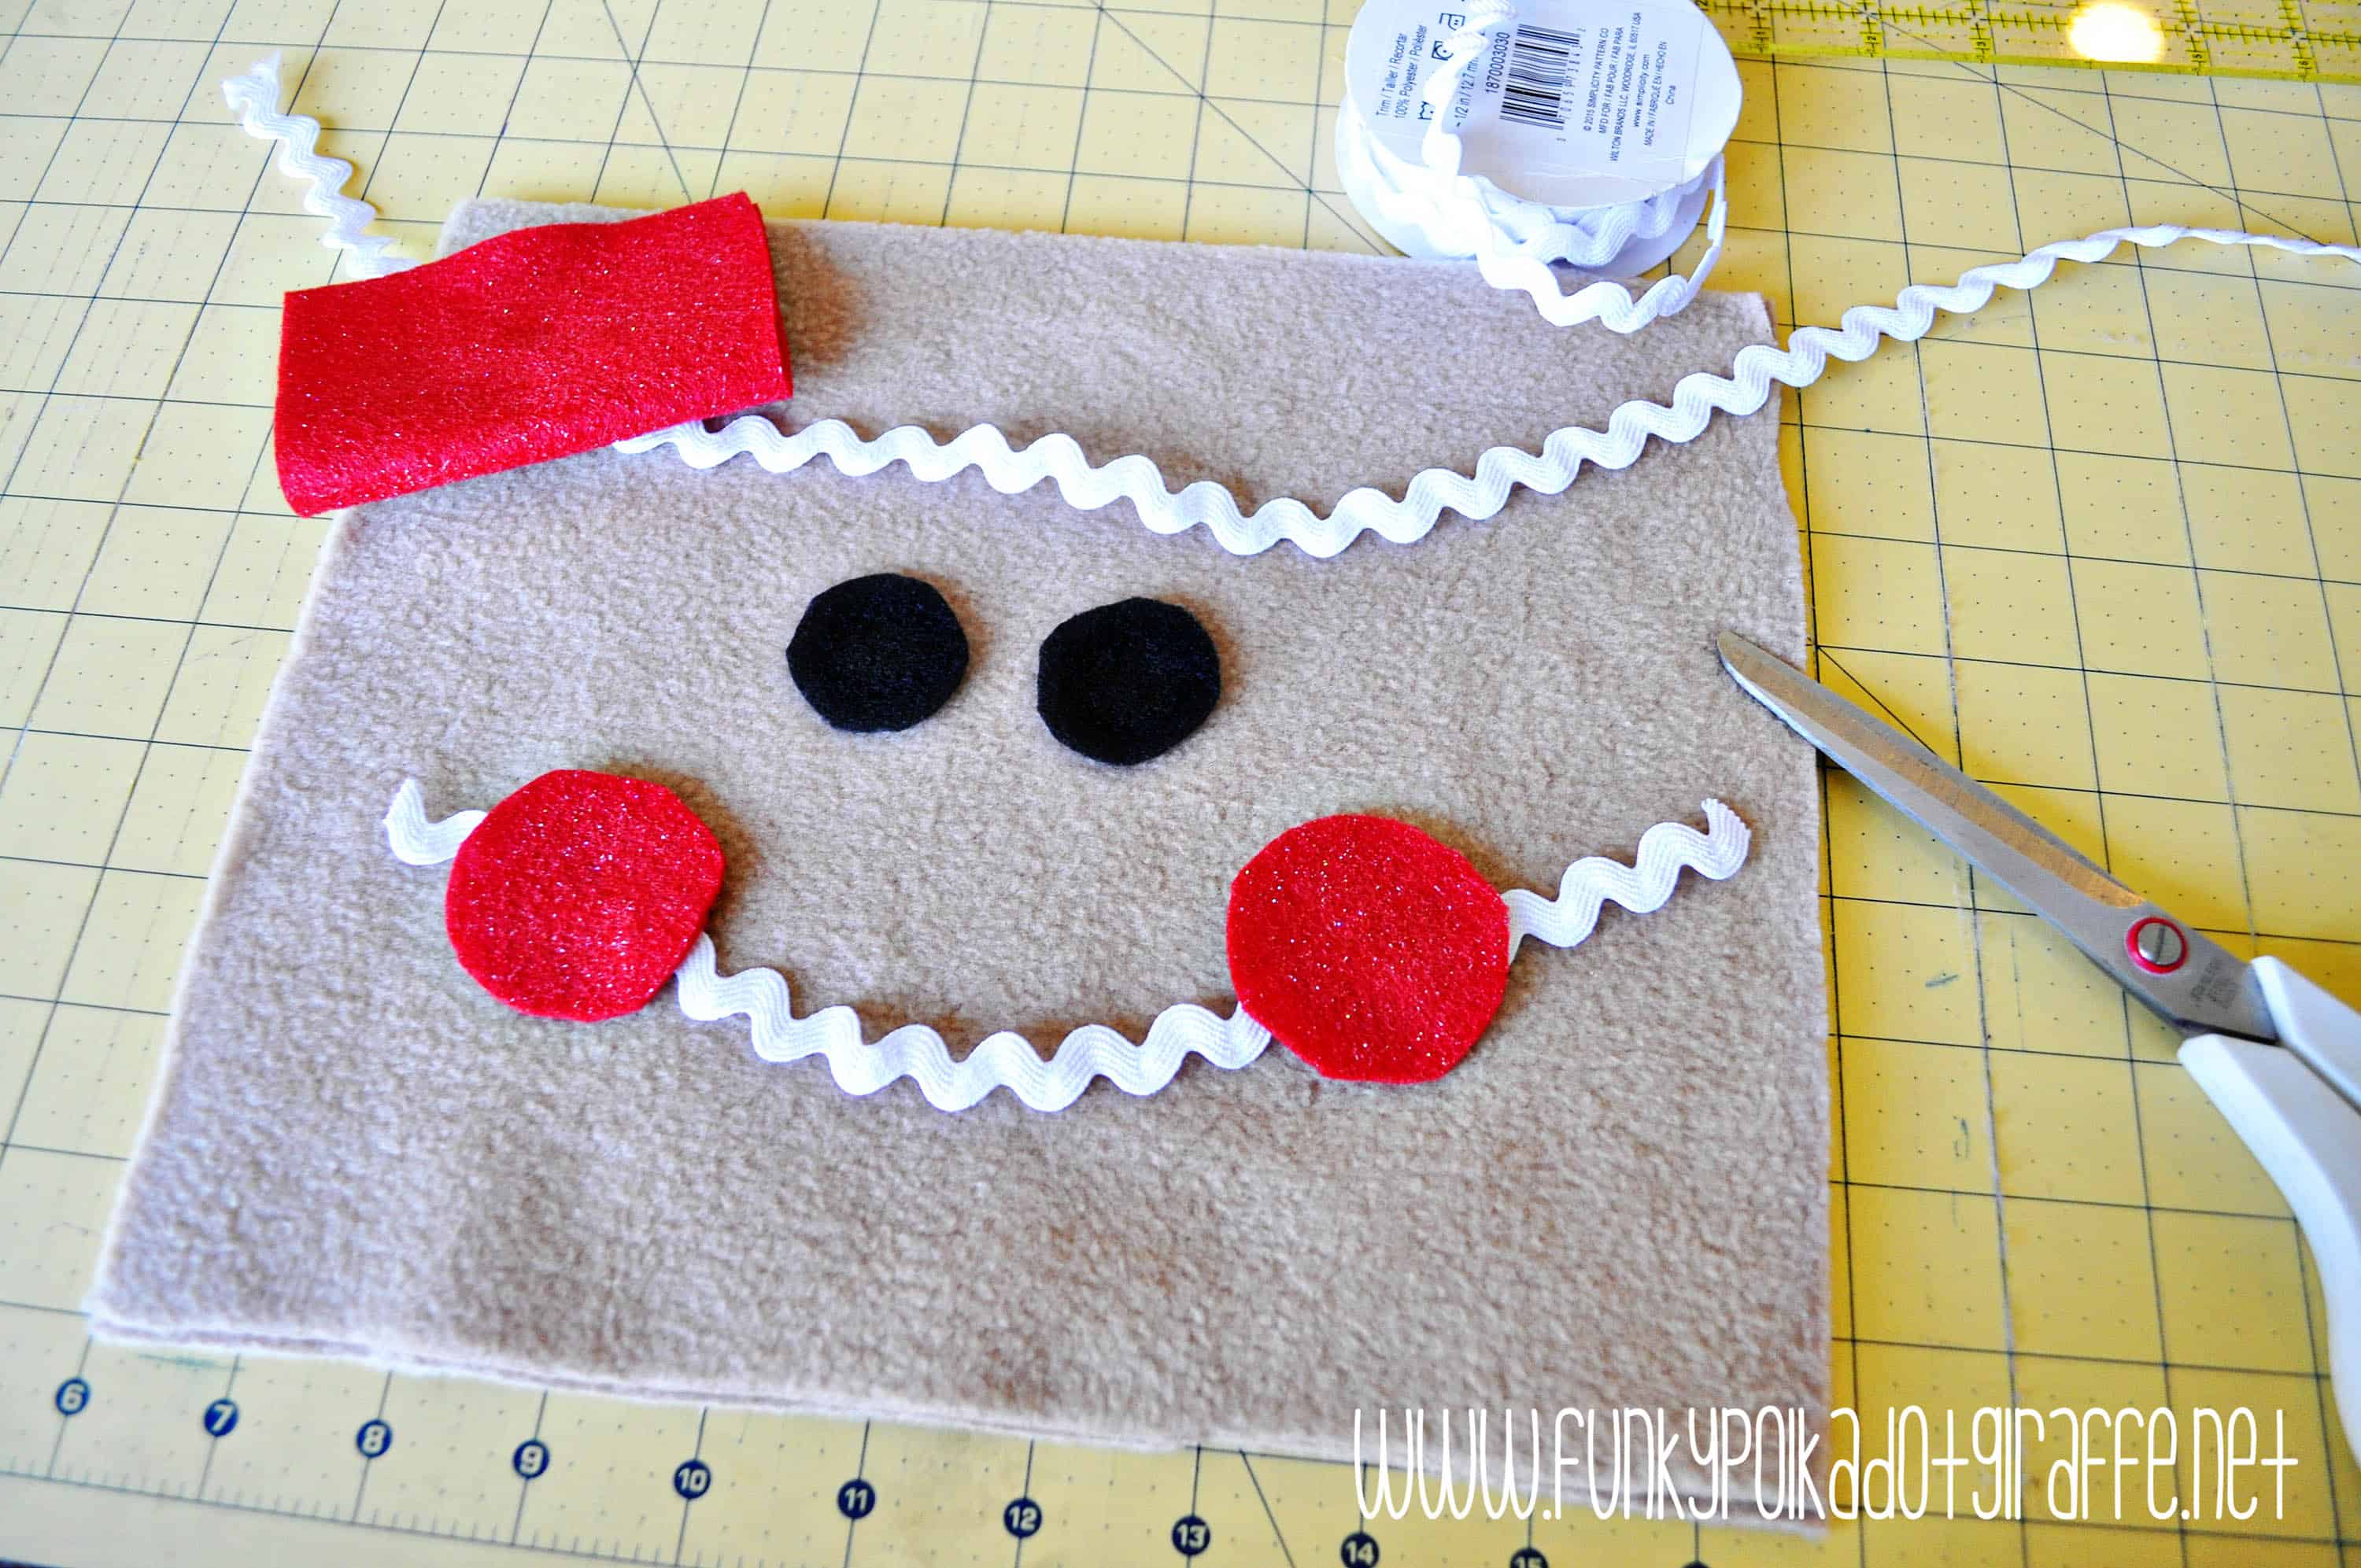
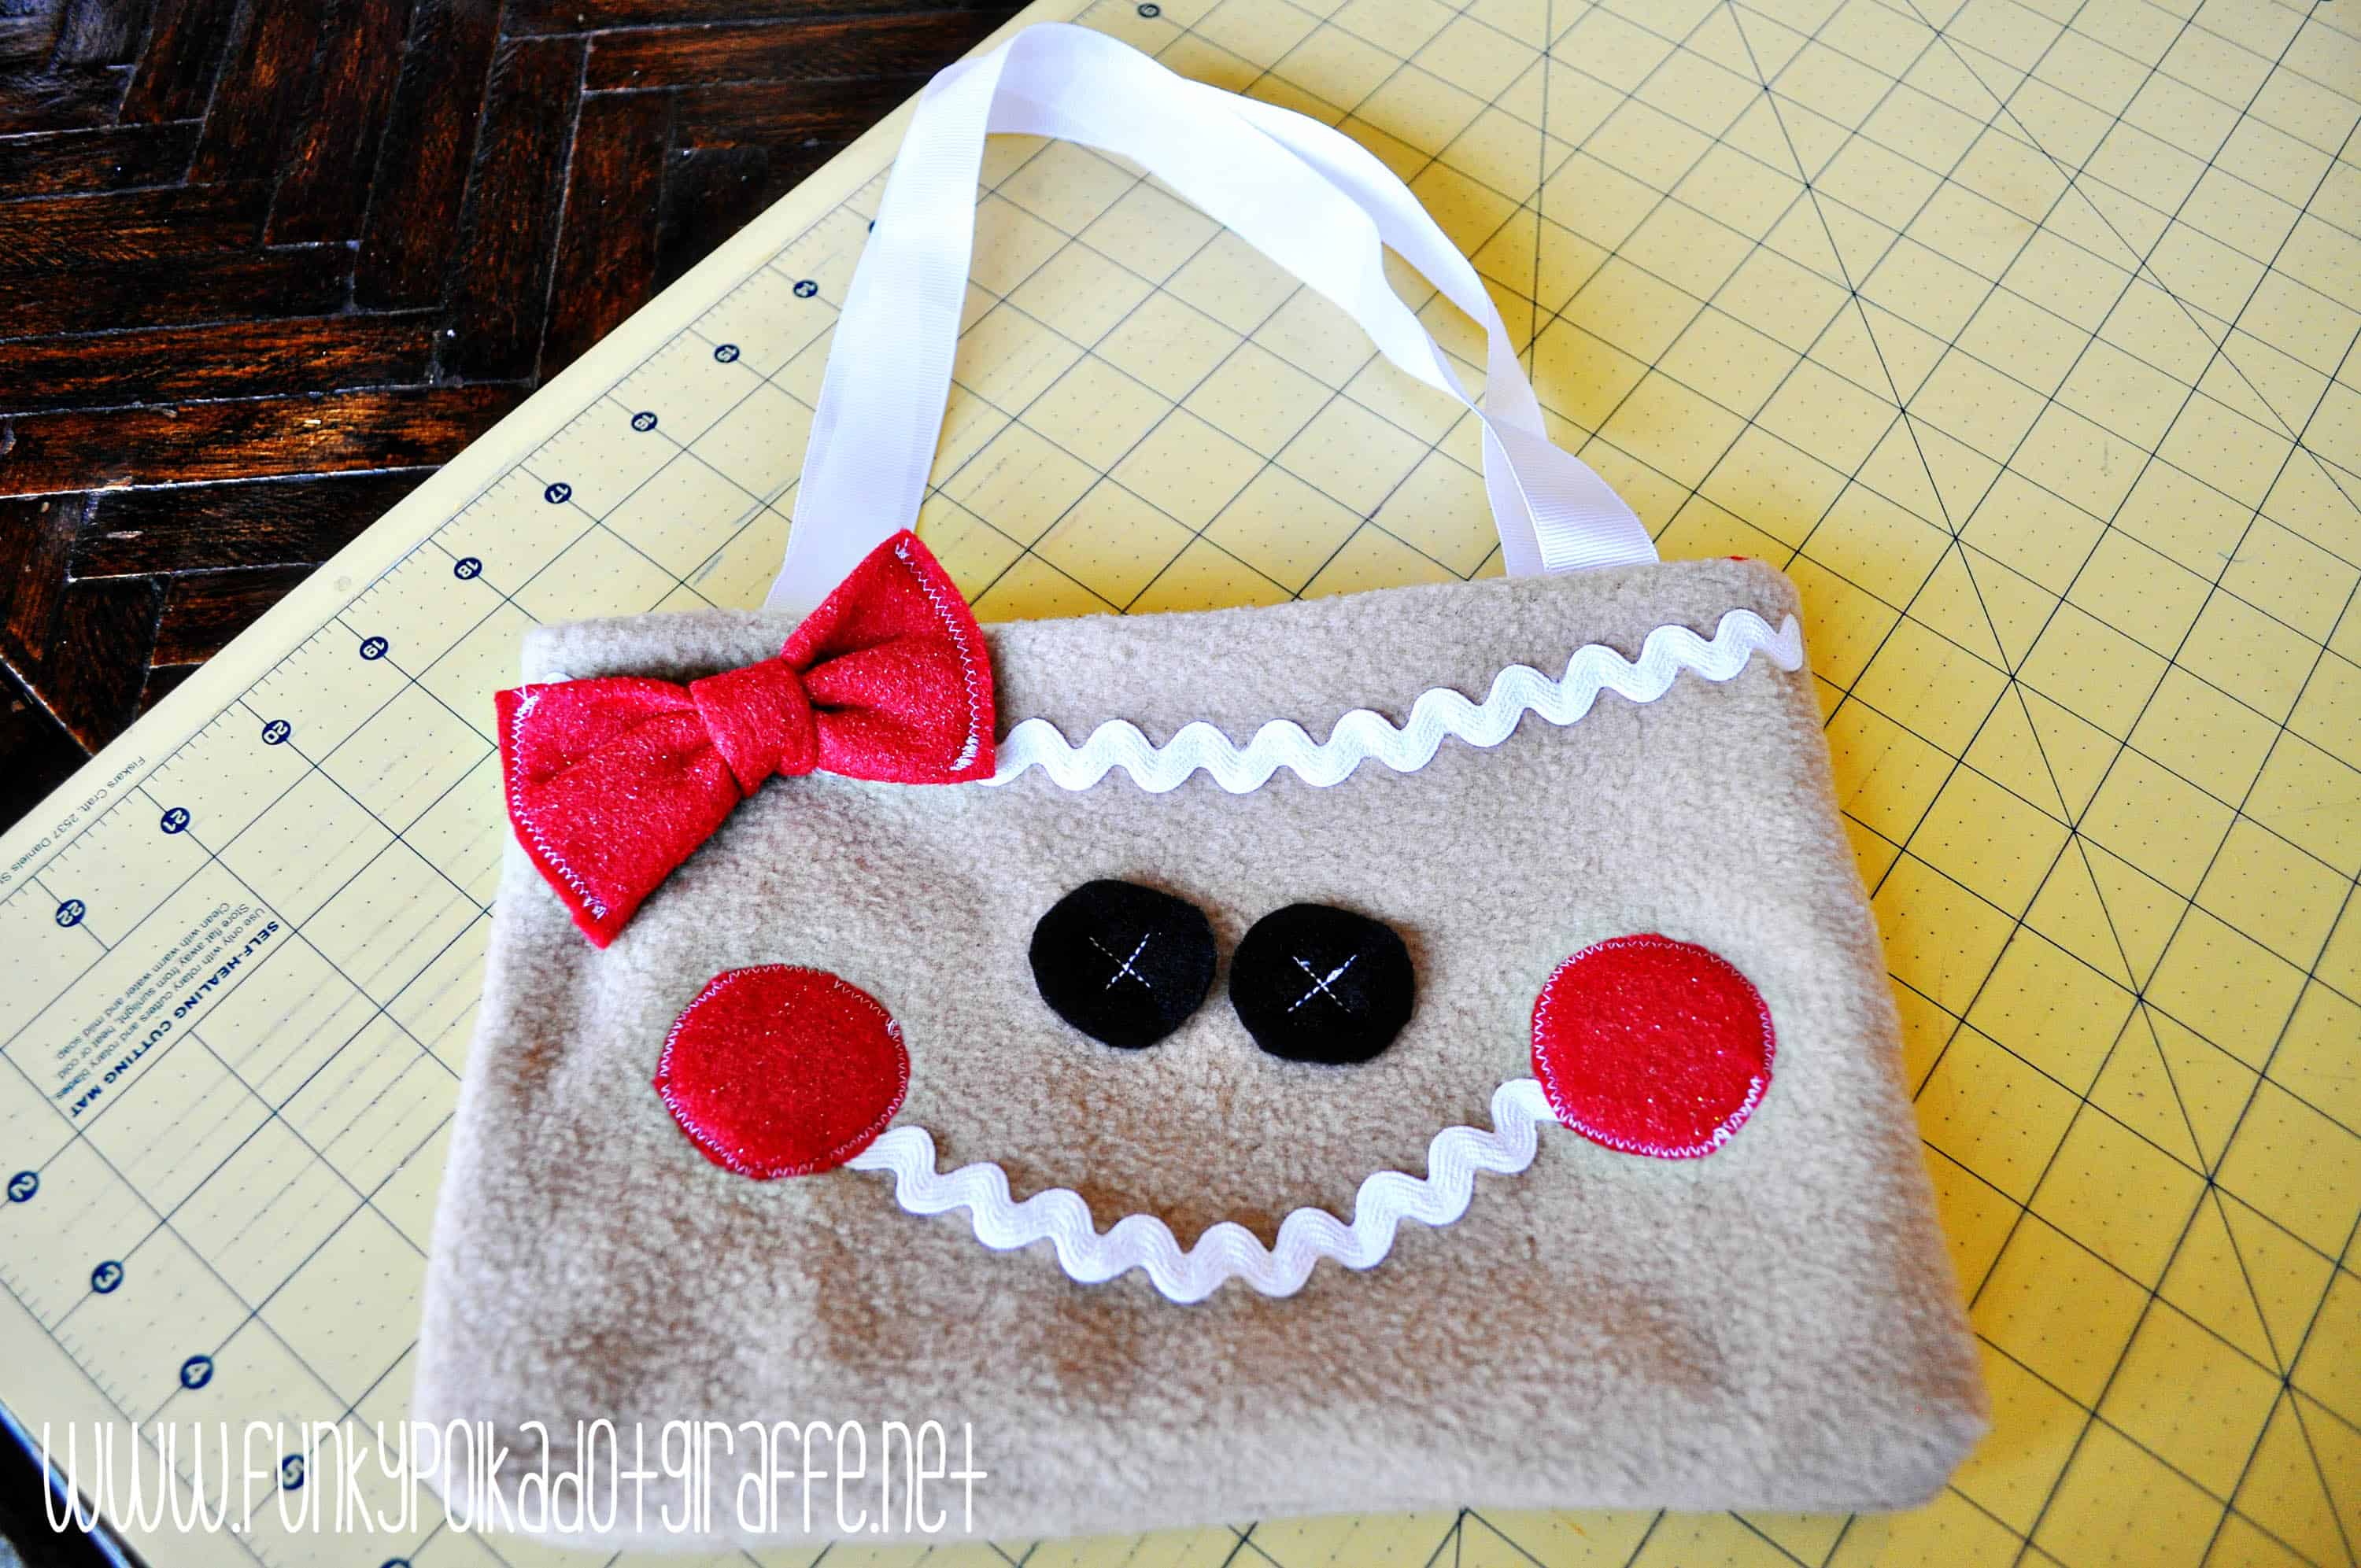
I cut my two pieces of brown fleece to 9″x11″ and cut the pieces for my gingerbread girl’s face. Then, I laid them out to see how I wanted to them to fit. I just eyeballed my eyes and cheeks by free-hand cutting circles out of a scrap of felt. I used glitter felt for the cheeks because I like the pop it added. Once I adjusted the size of the eyes and cheeks, and figured out how much ric-rac I needed for the frosting stripe and the mouth, I got to sewing!
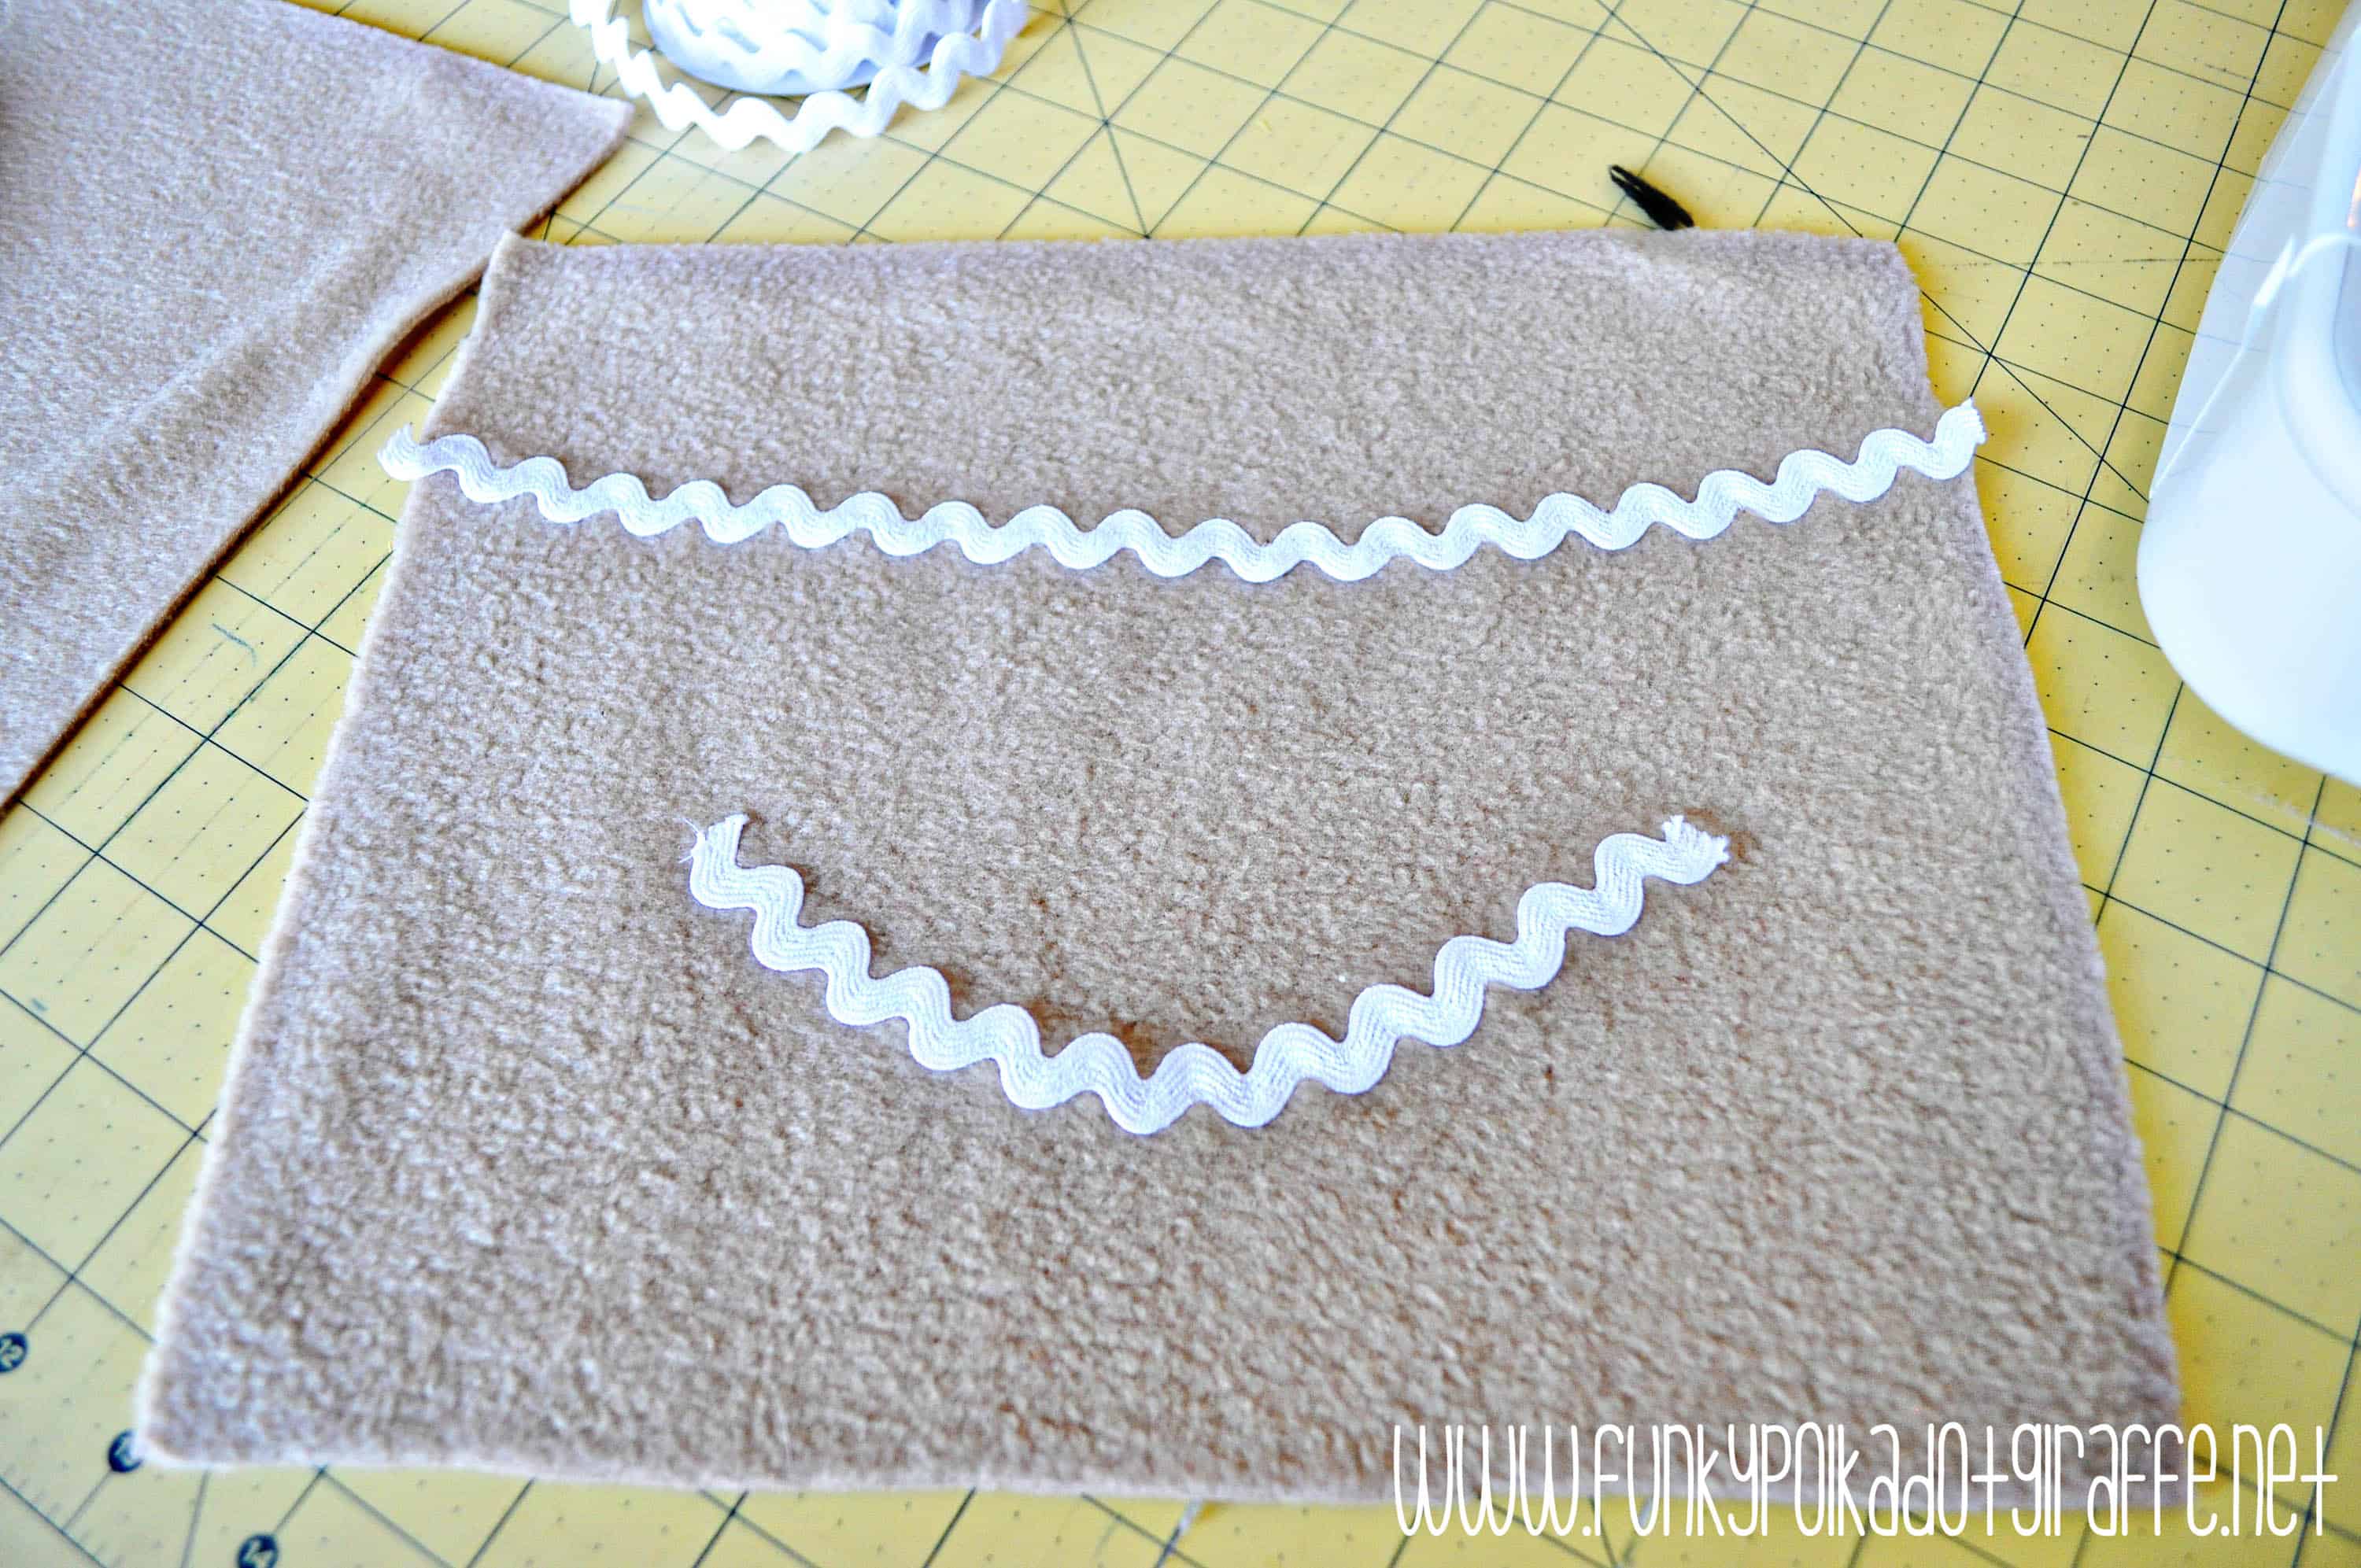
First, I sewed the frosting stripe and the mouth onto the brown fleece with a zigzag stitch. Just go slow and adjust as needed. I did pin the ric-rac down as best as I could, but it definitely was a bit tricky. I didn’t mind if it wasn’t perfect, but I wanted it pretty close. Also, make sure the ric-rac doesn’t get too close to the top or bottom. This way it doesn’t get swallowed up in the seam allowance when you start putting the bag together.
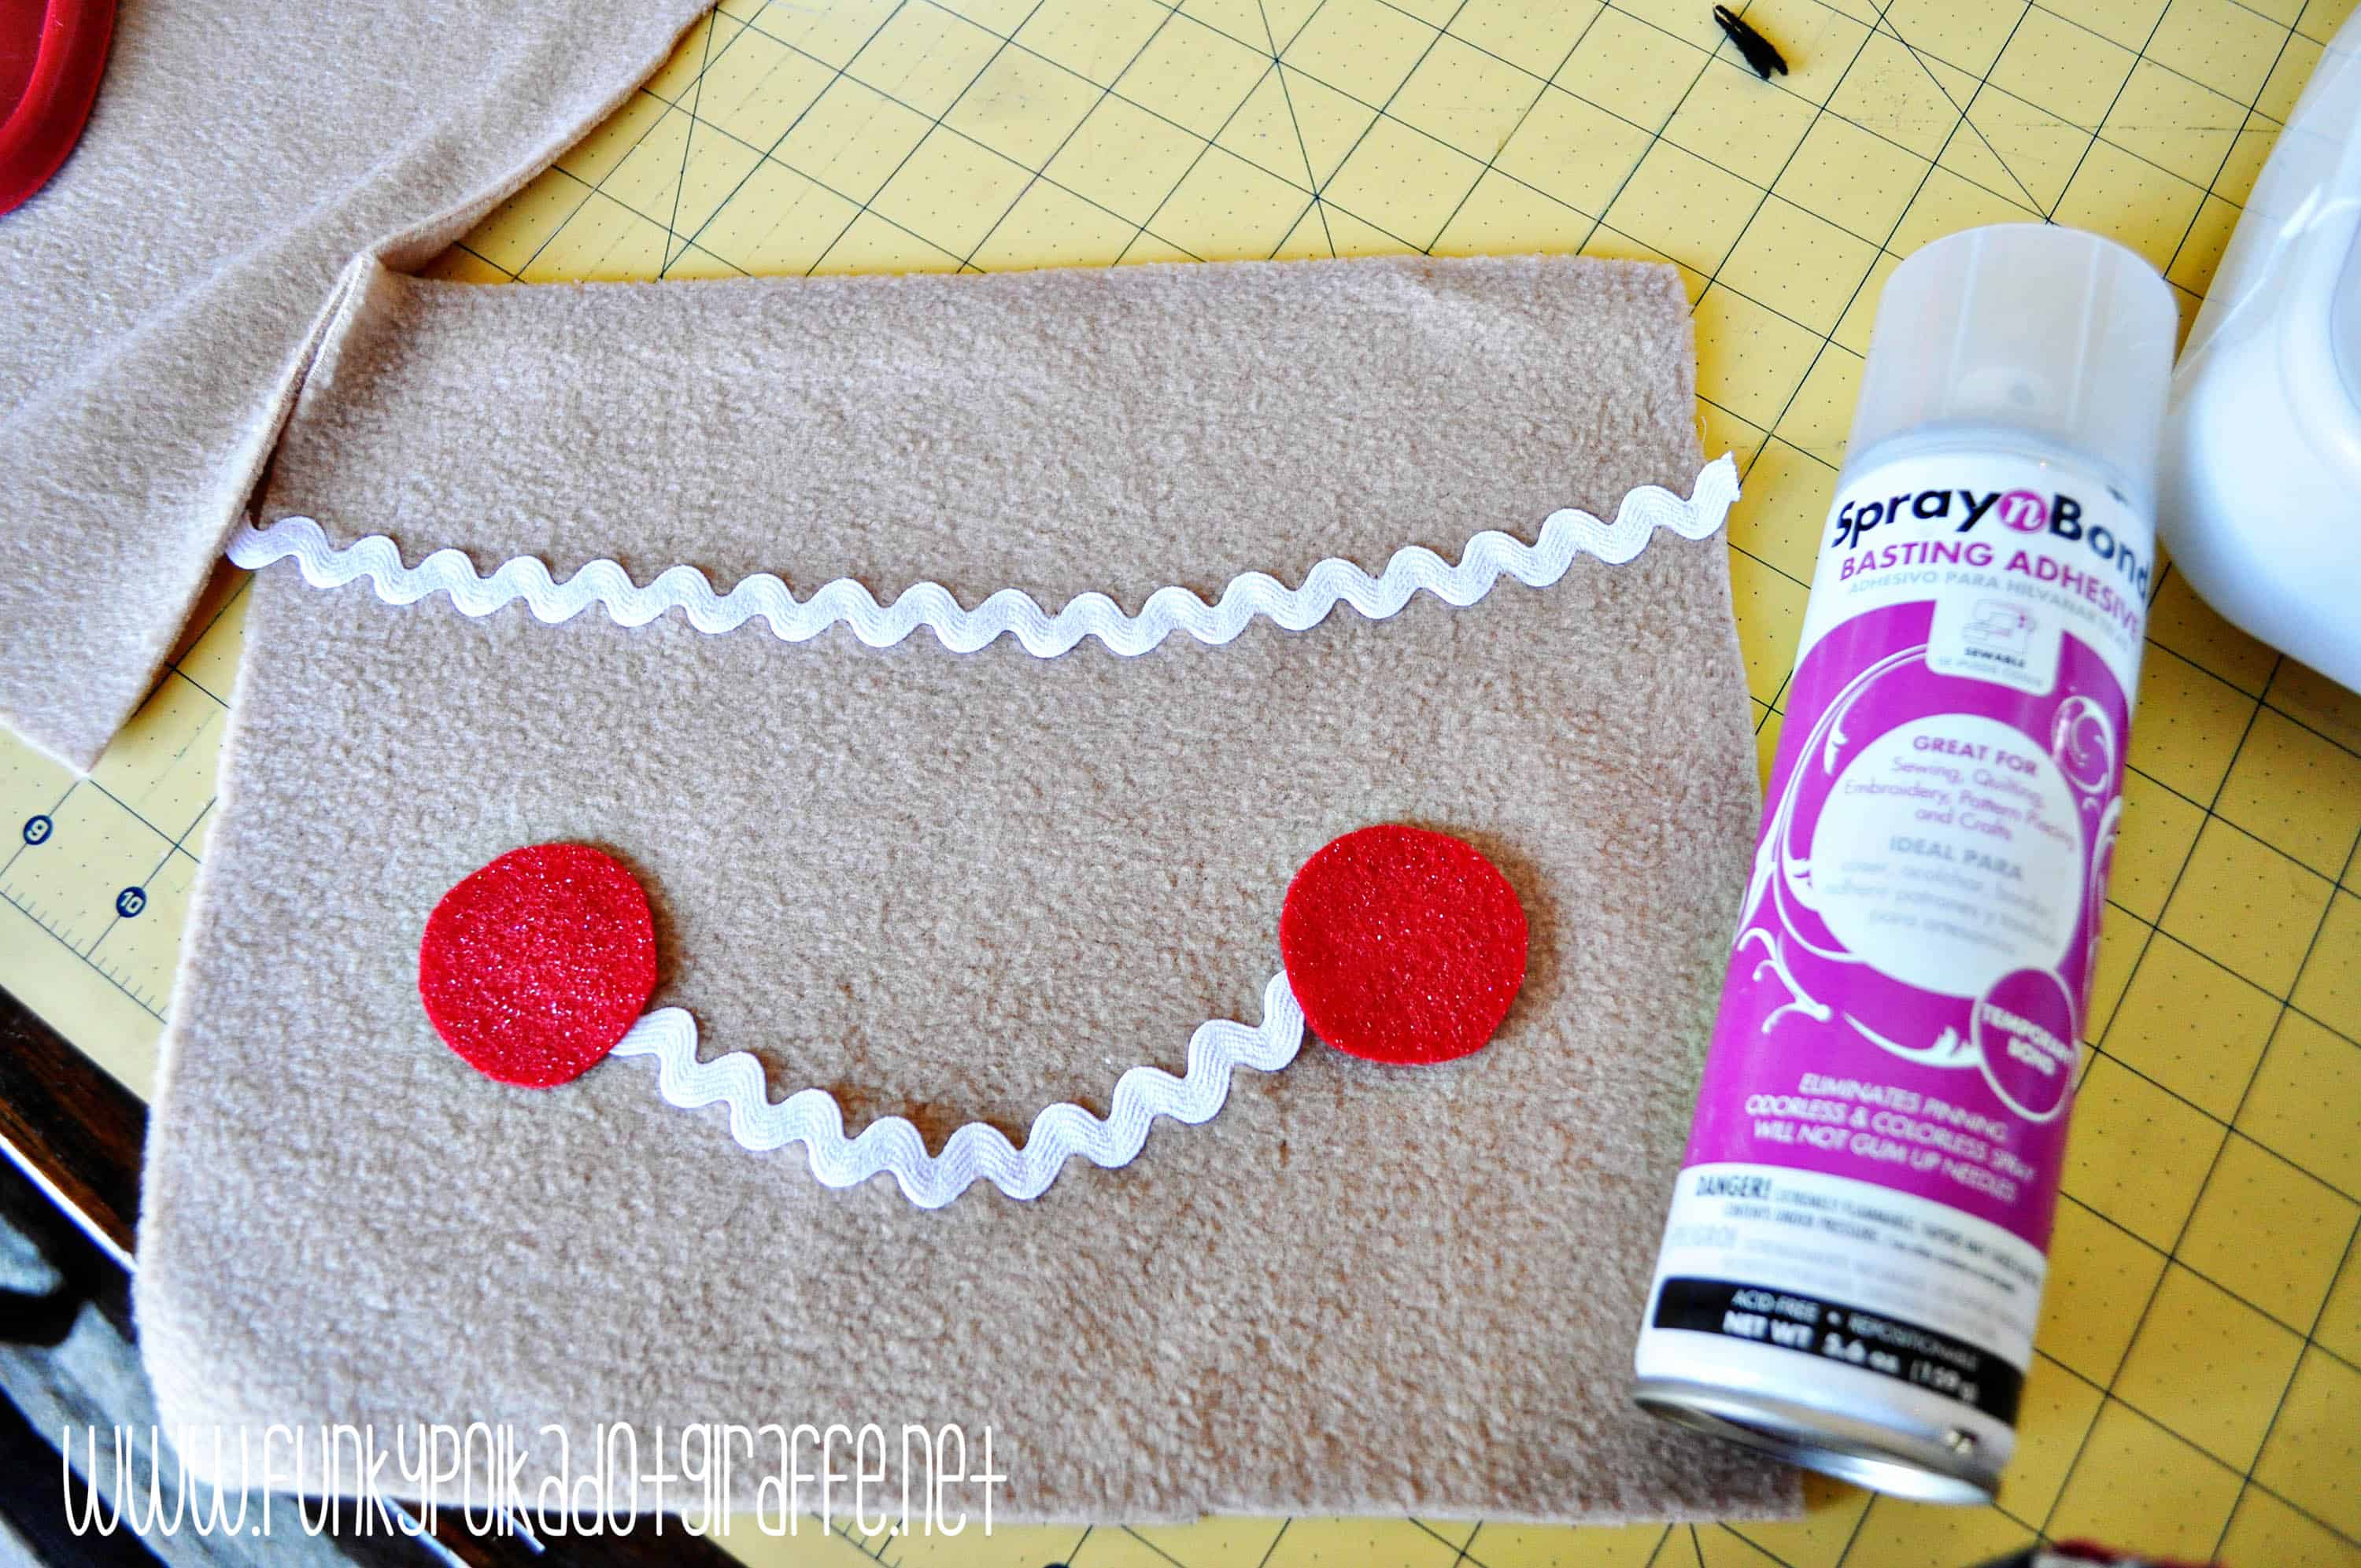
Next, I put the cheeks on. Instead of using pins, I used some basting adhesive. Again, I used a zigzag stitch to put the cheeks on. For the eyes, I sewed a couple of “X”s to make them look like buttons. If you want to use large black buttons instead – you can. I didn’t for two reason: {1} I didn’t have any that were big enough and {2} Since I am making this for a little girl, I didn’t want to create a choking hazard.
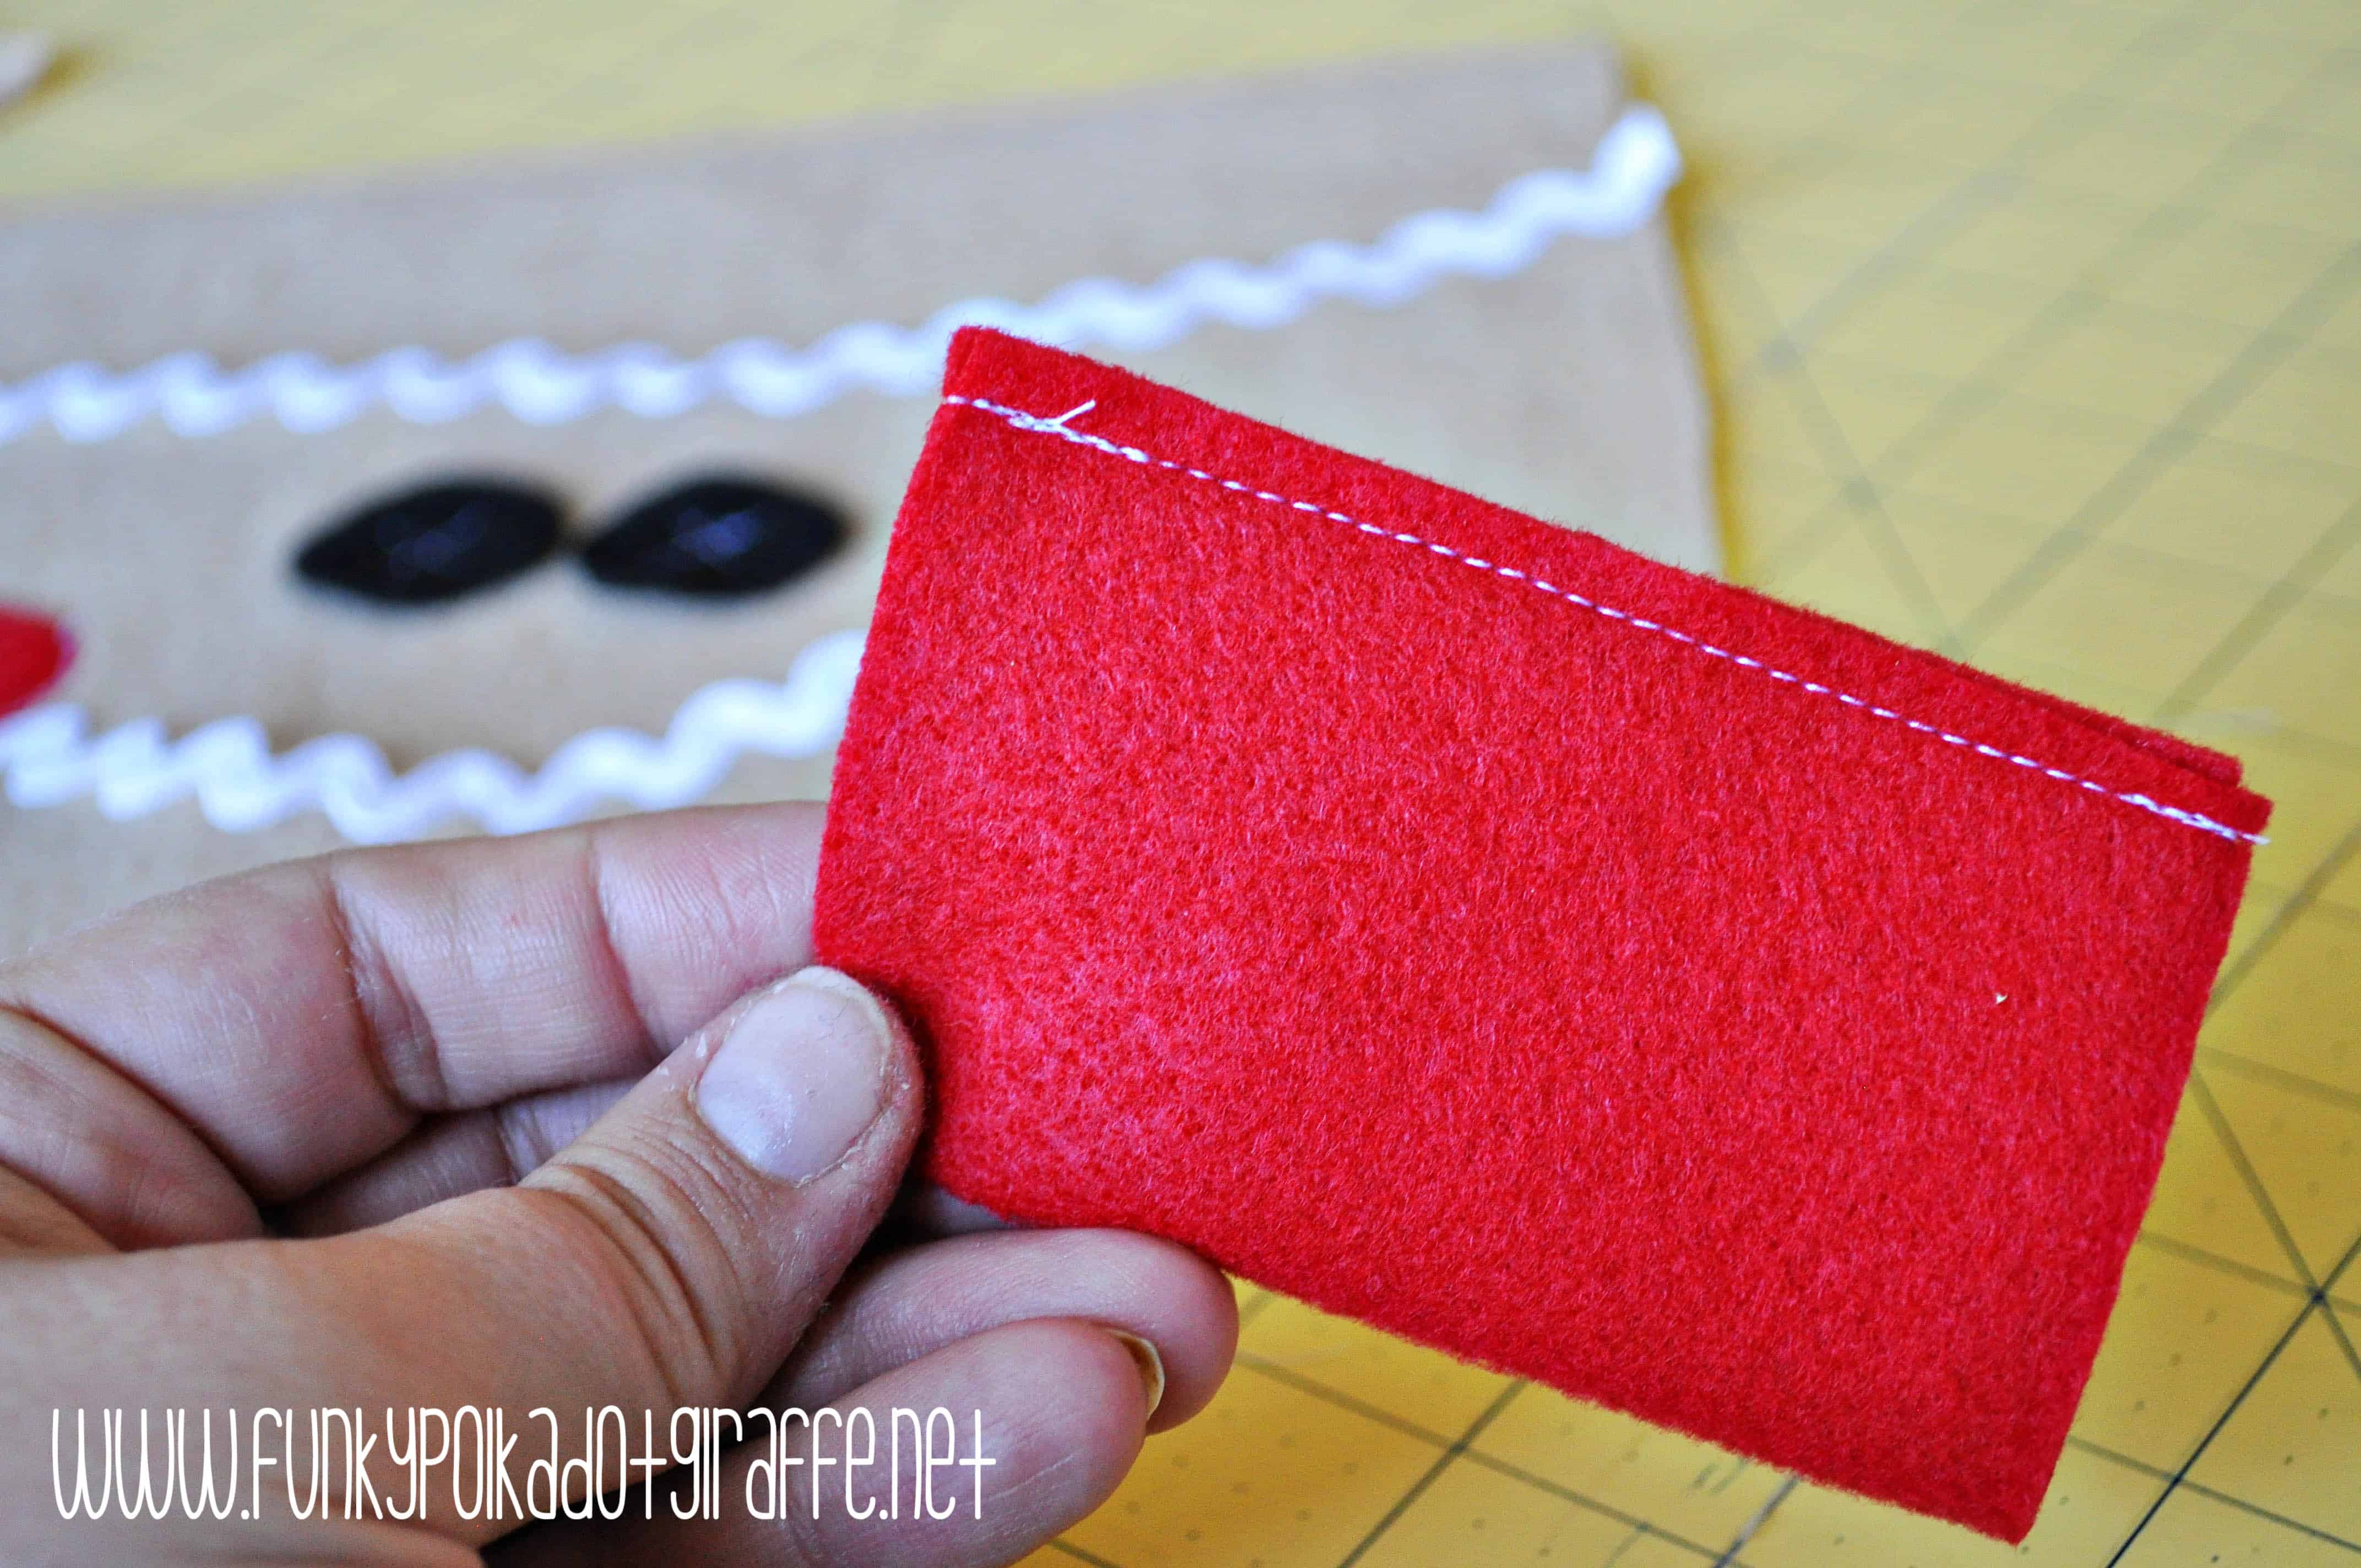
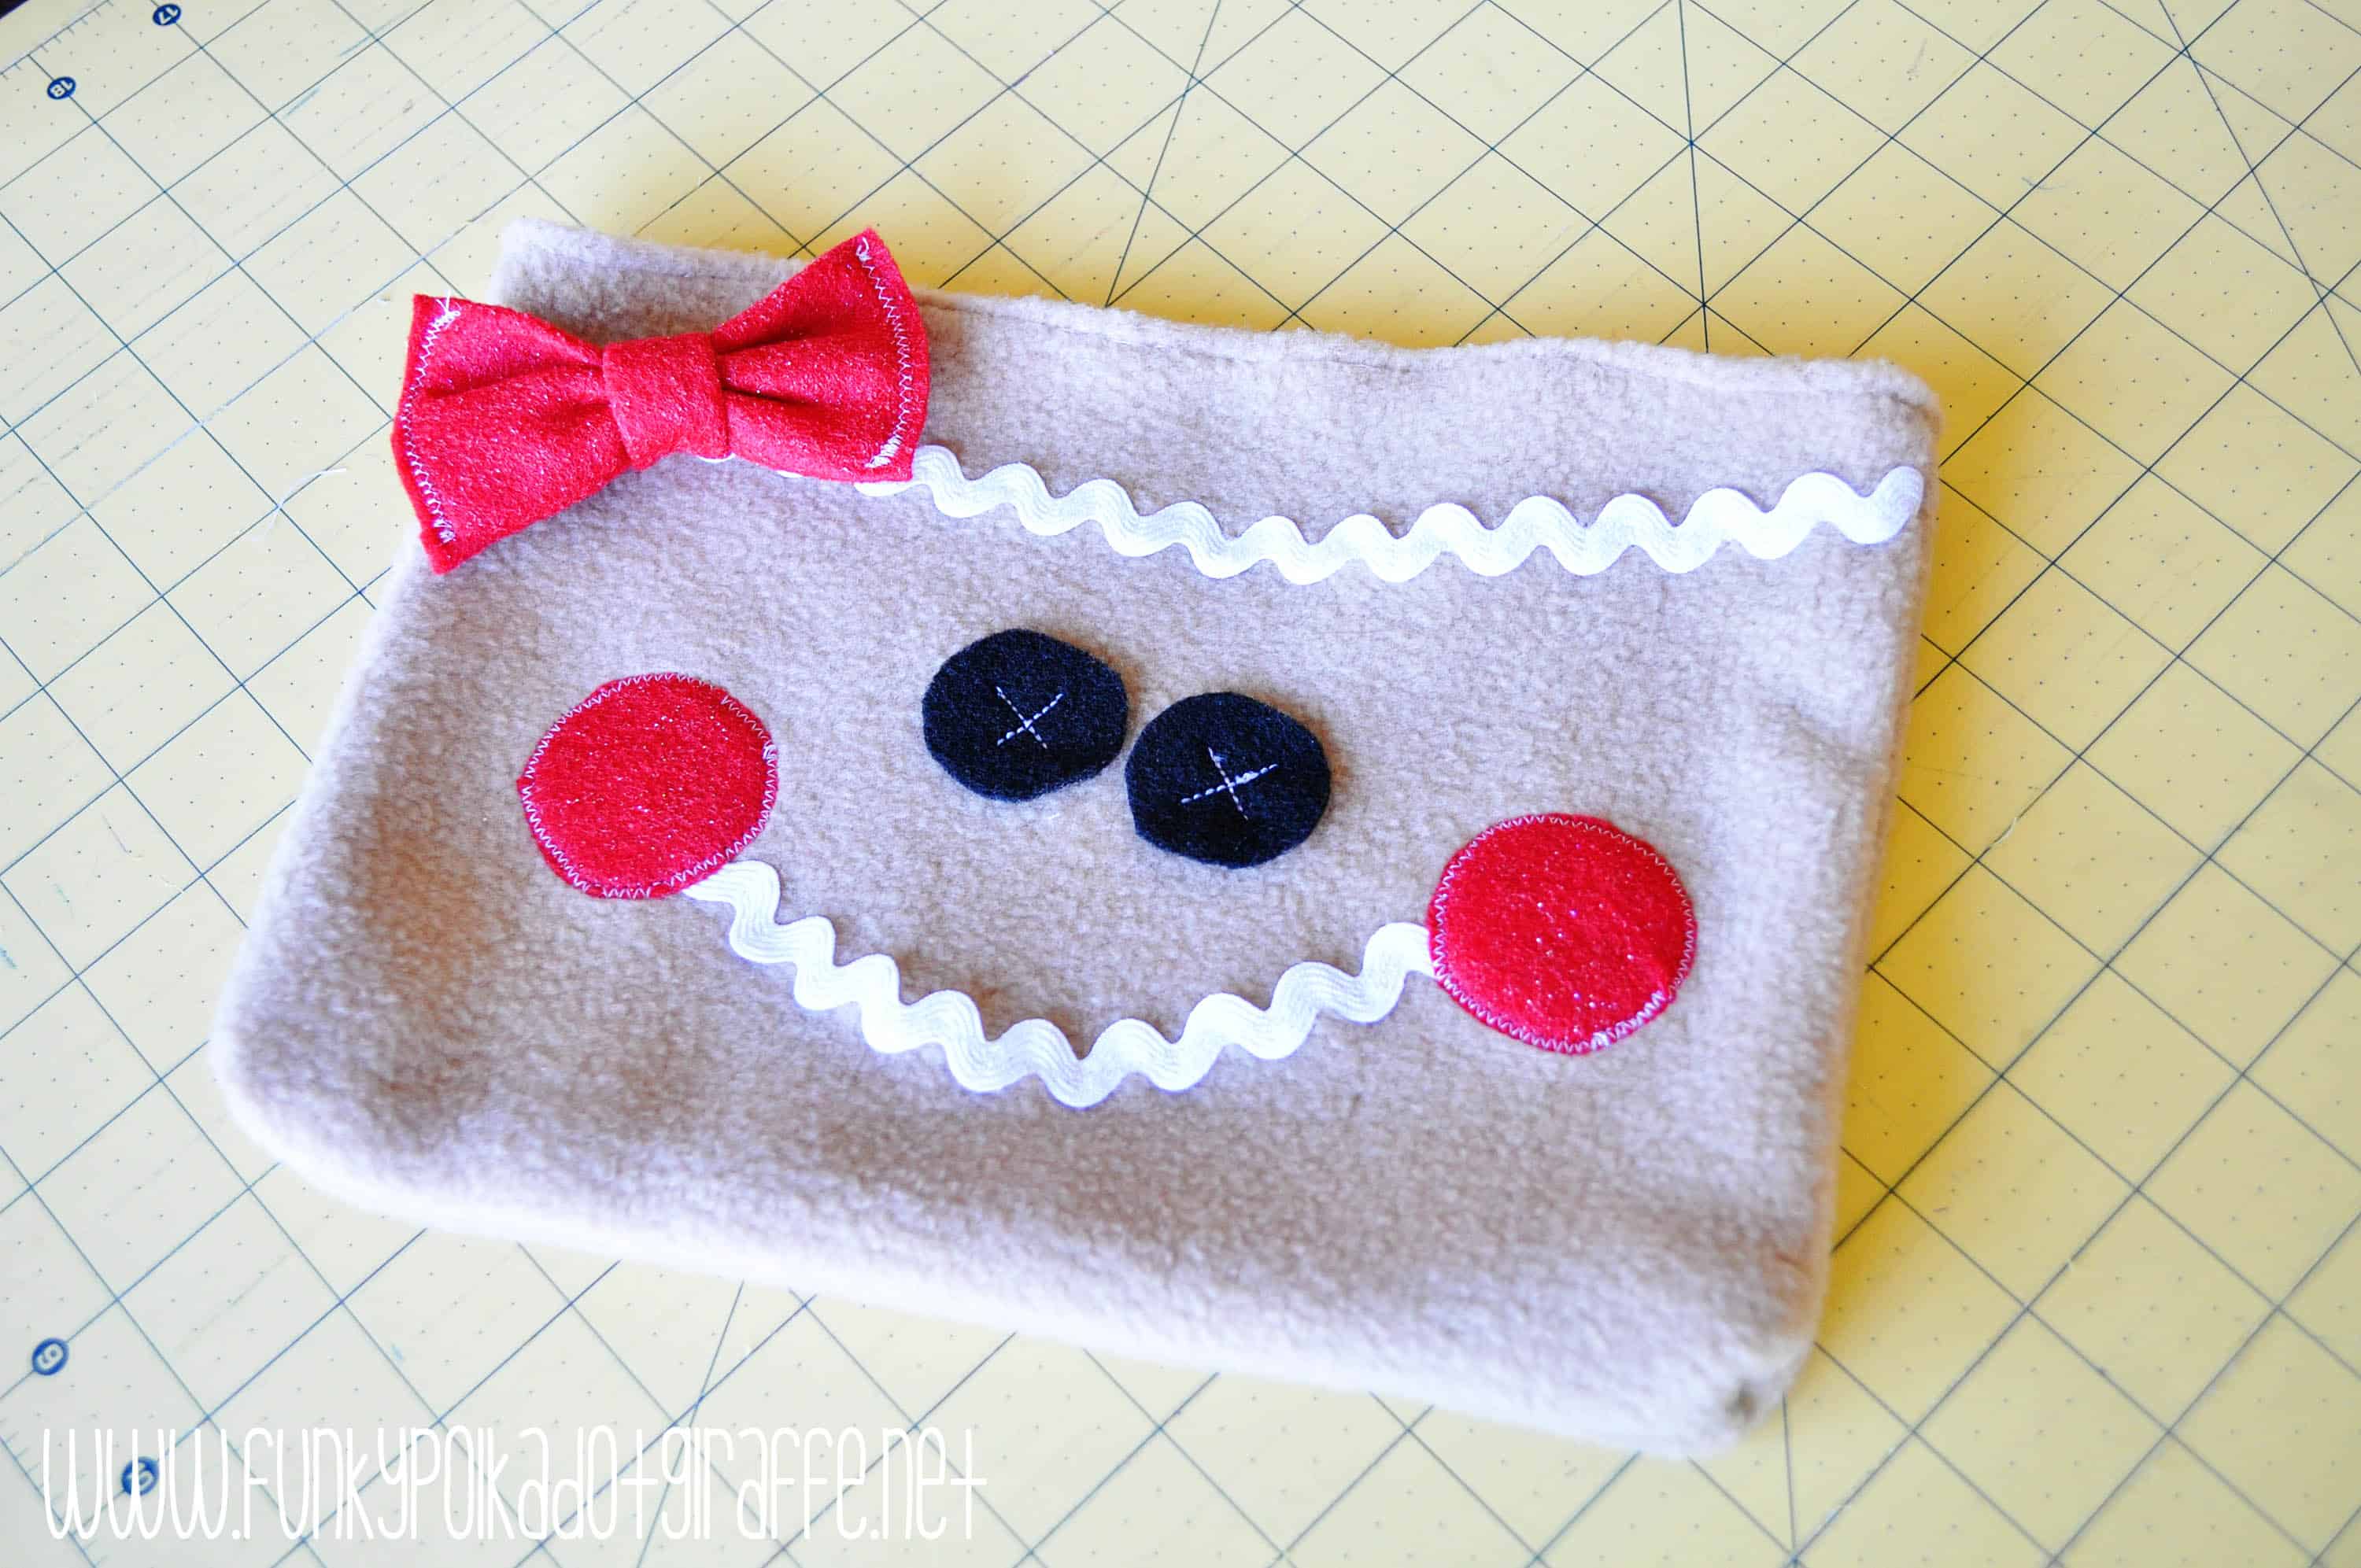
Once your face is all sewn on, then you can make a little felt bow if your gingerbread purse is a girl like mine. I took another scrap of felt about 3″x4″, folded it in half and sewed the open edge. Then, I flipped it right side out and sewed up the open edges. I took another little scrap and made a middle piece, scrunched up the bow in the middle and hand sewed the middle piece to secure it and make a cute bow. It’s a lot like the bow I made for the Corn Heating Bag.
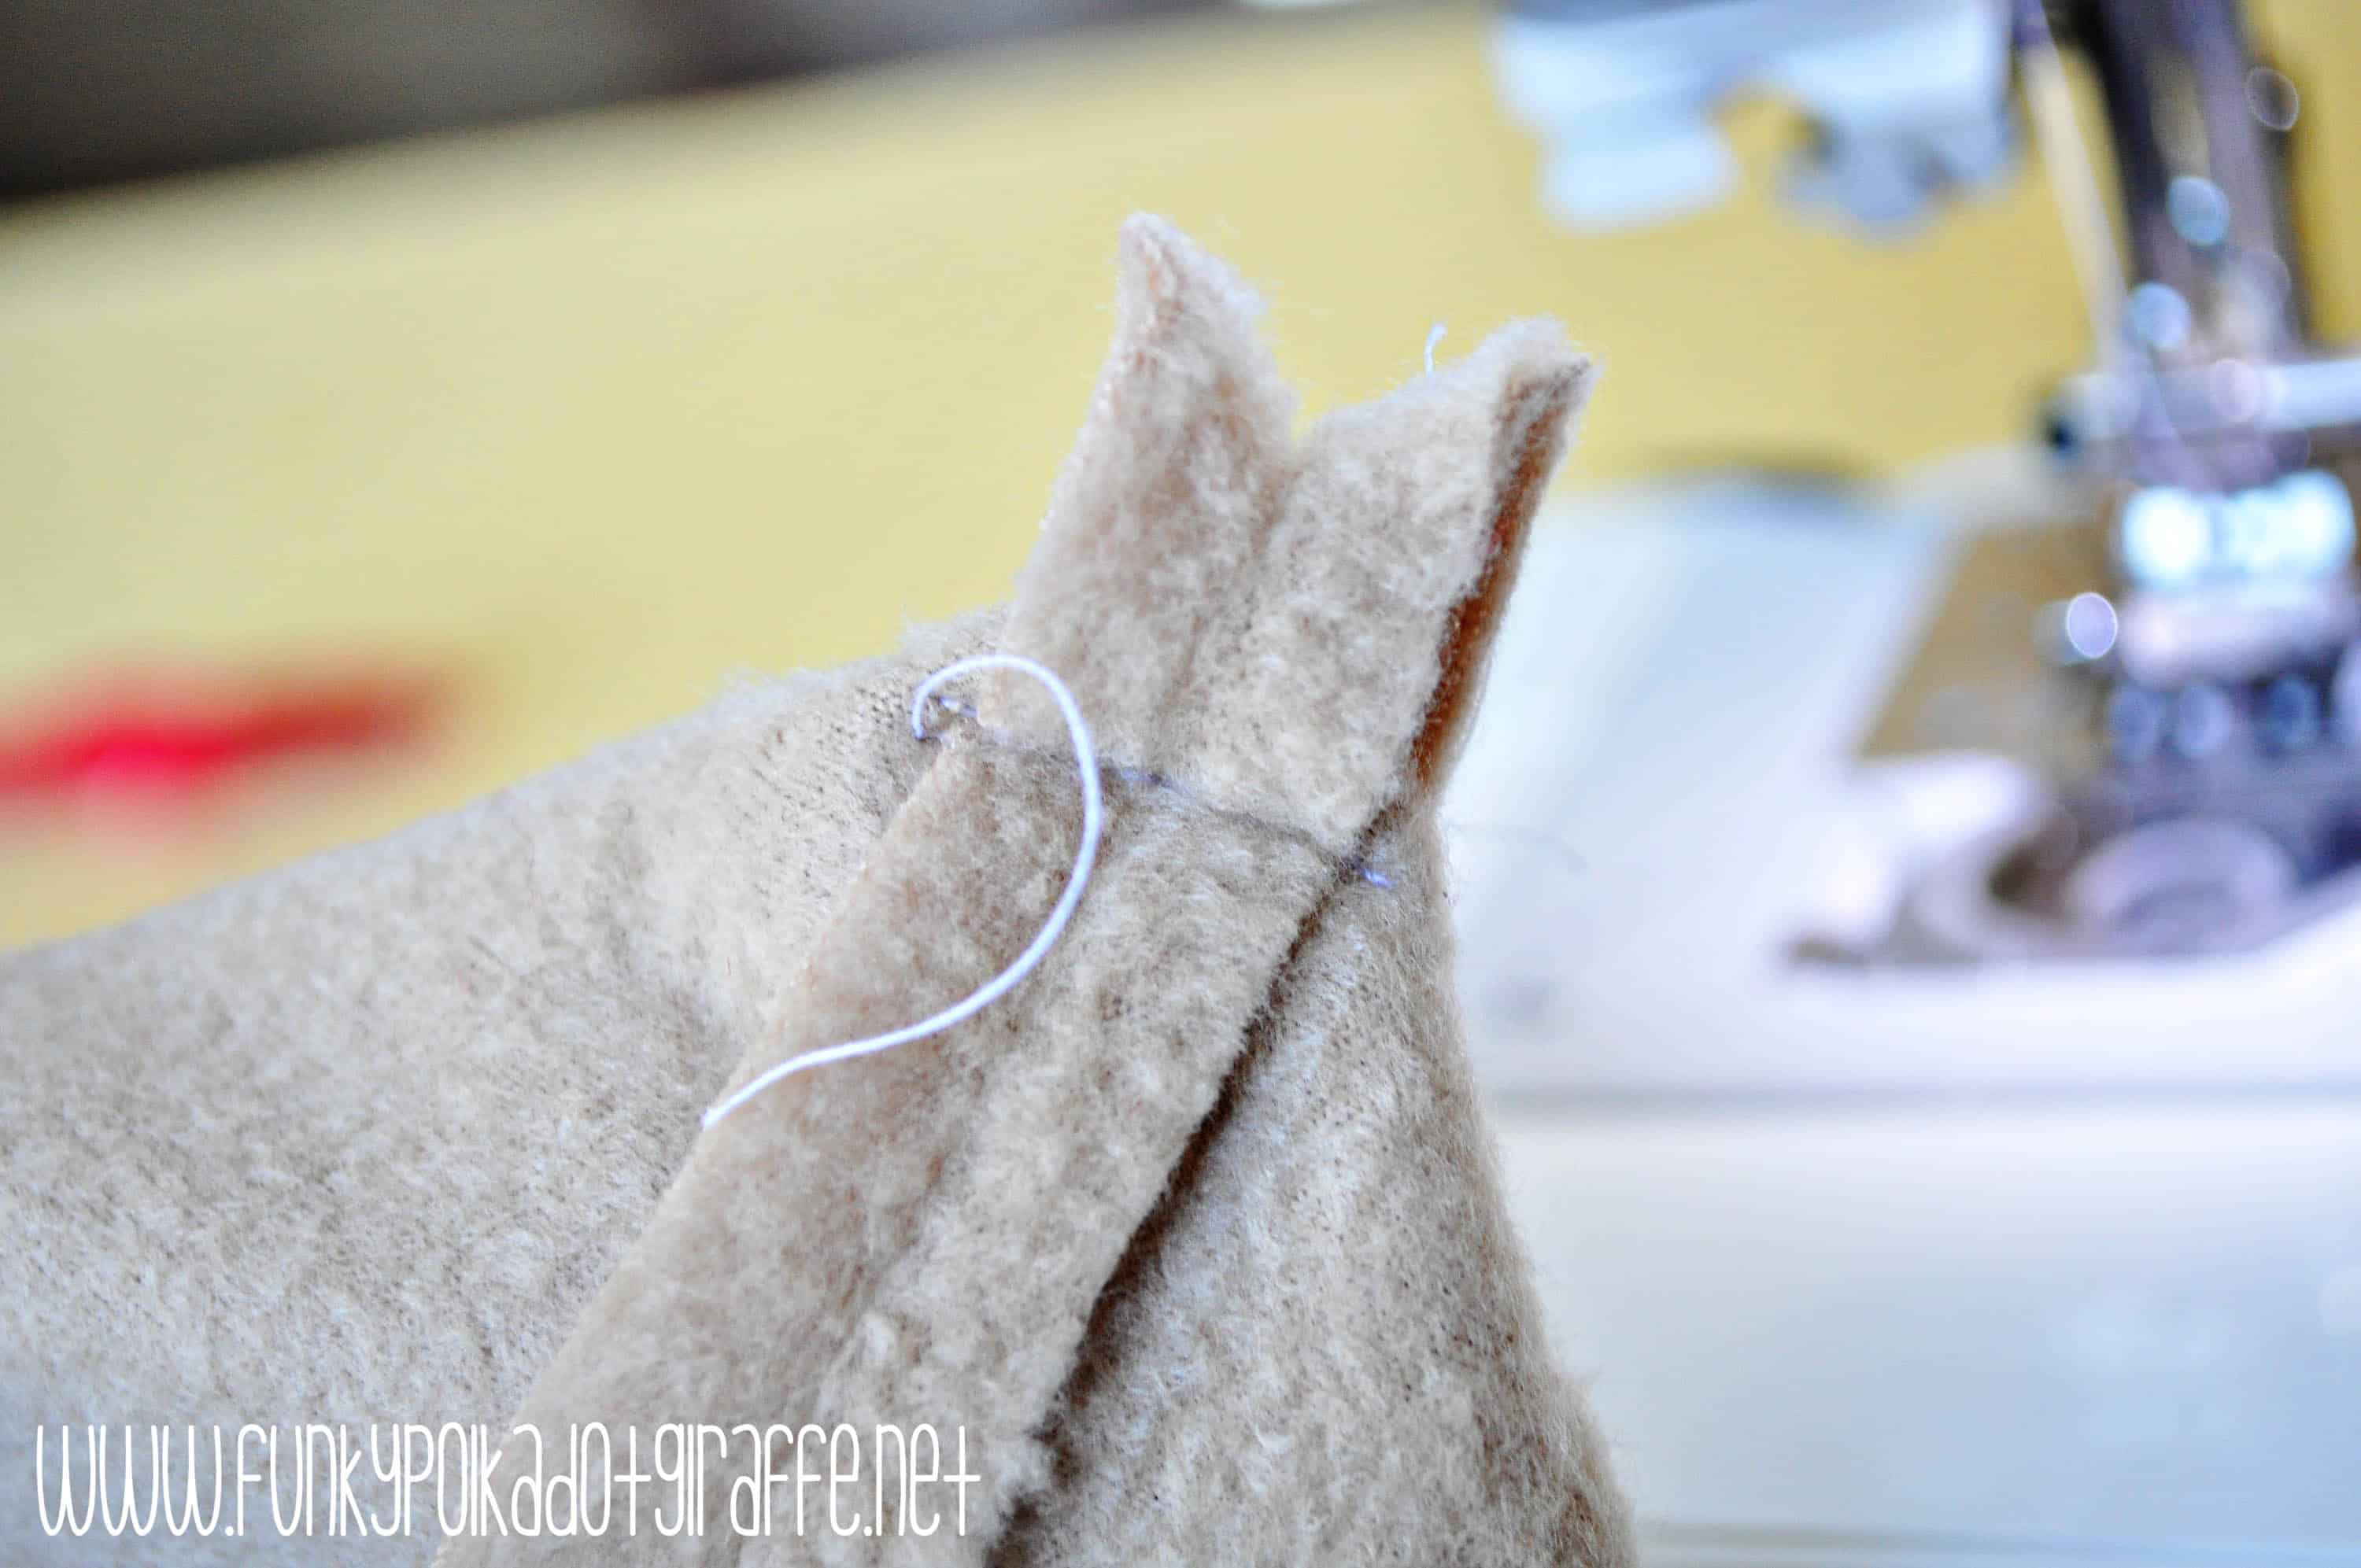
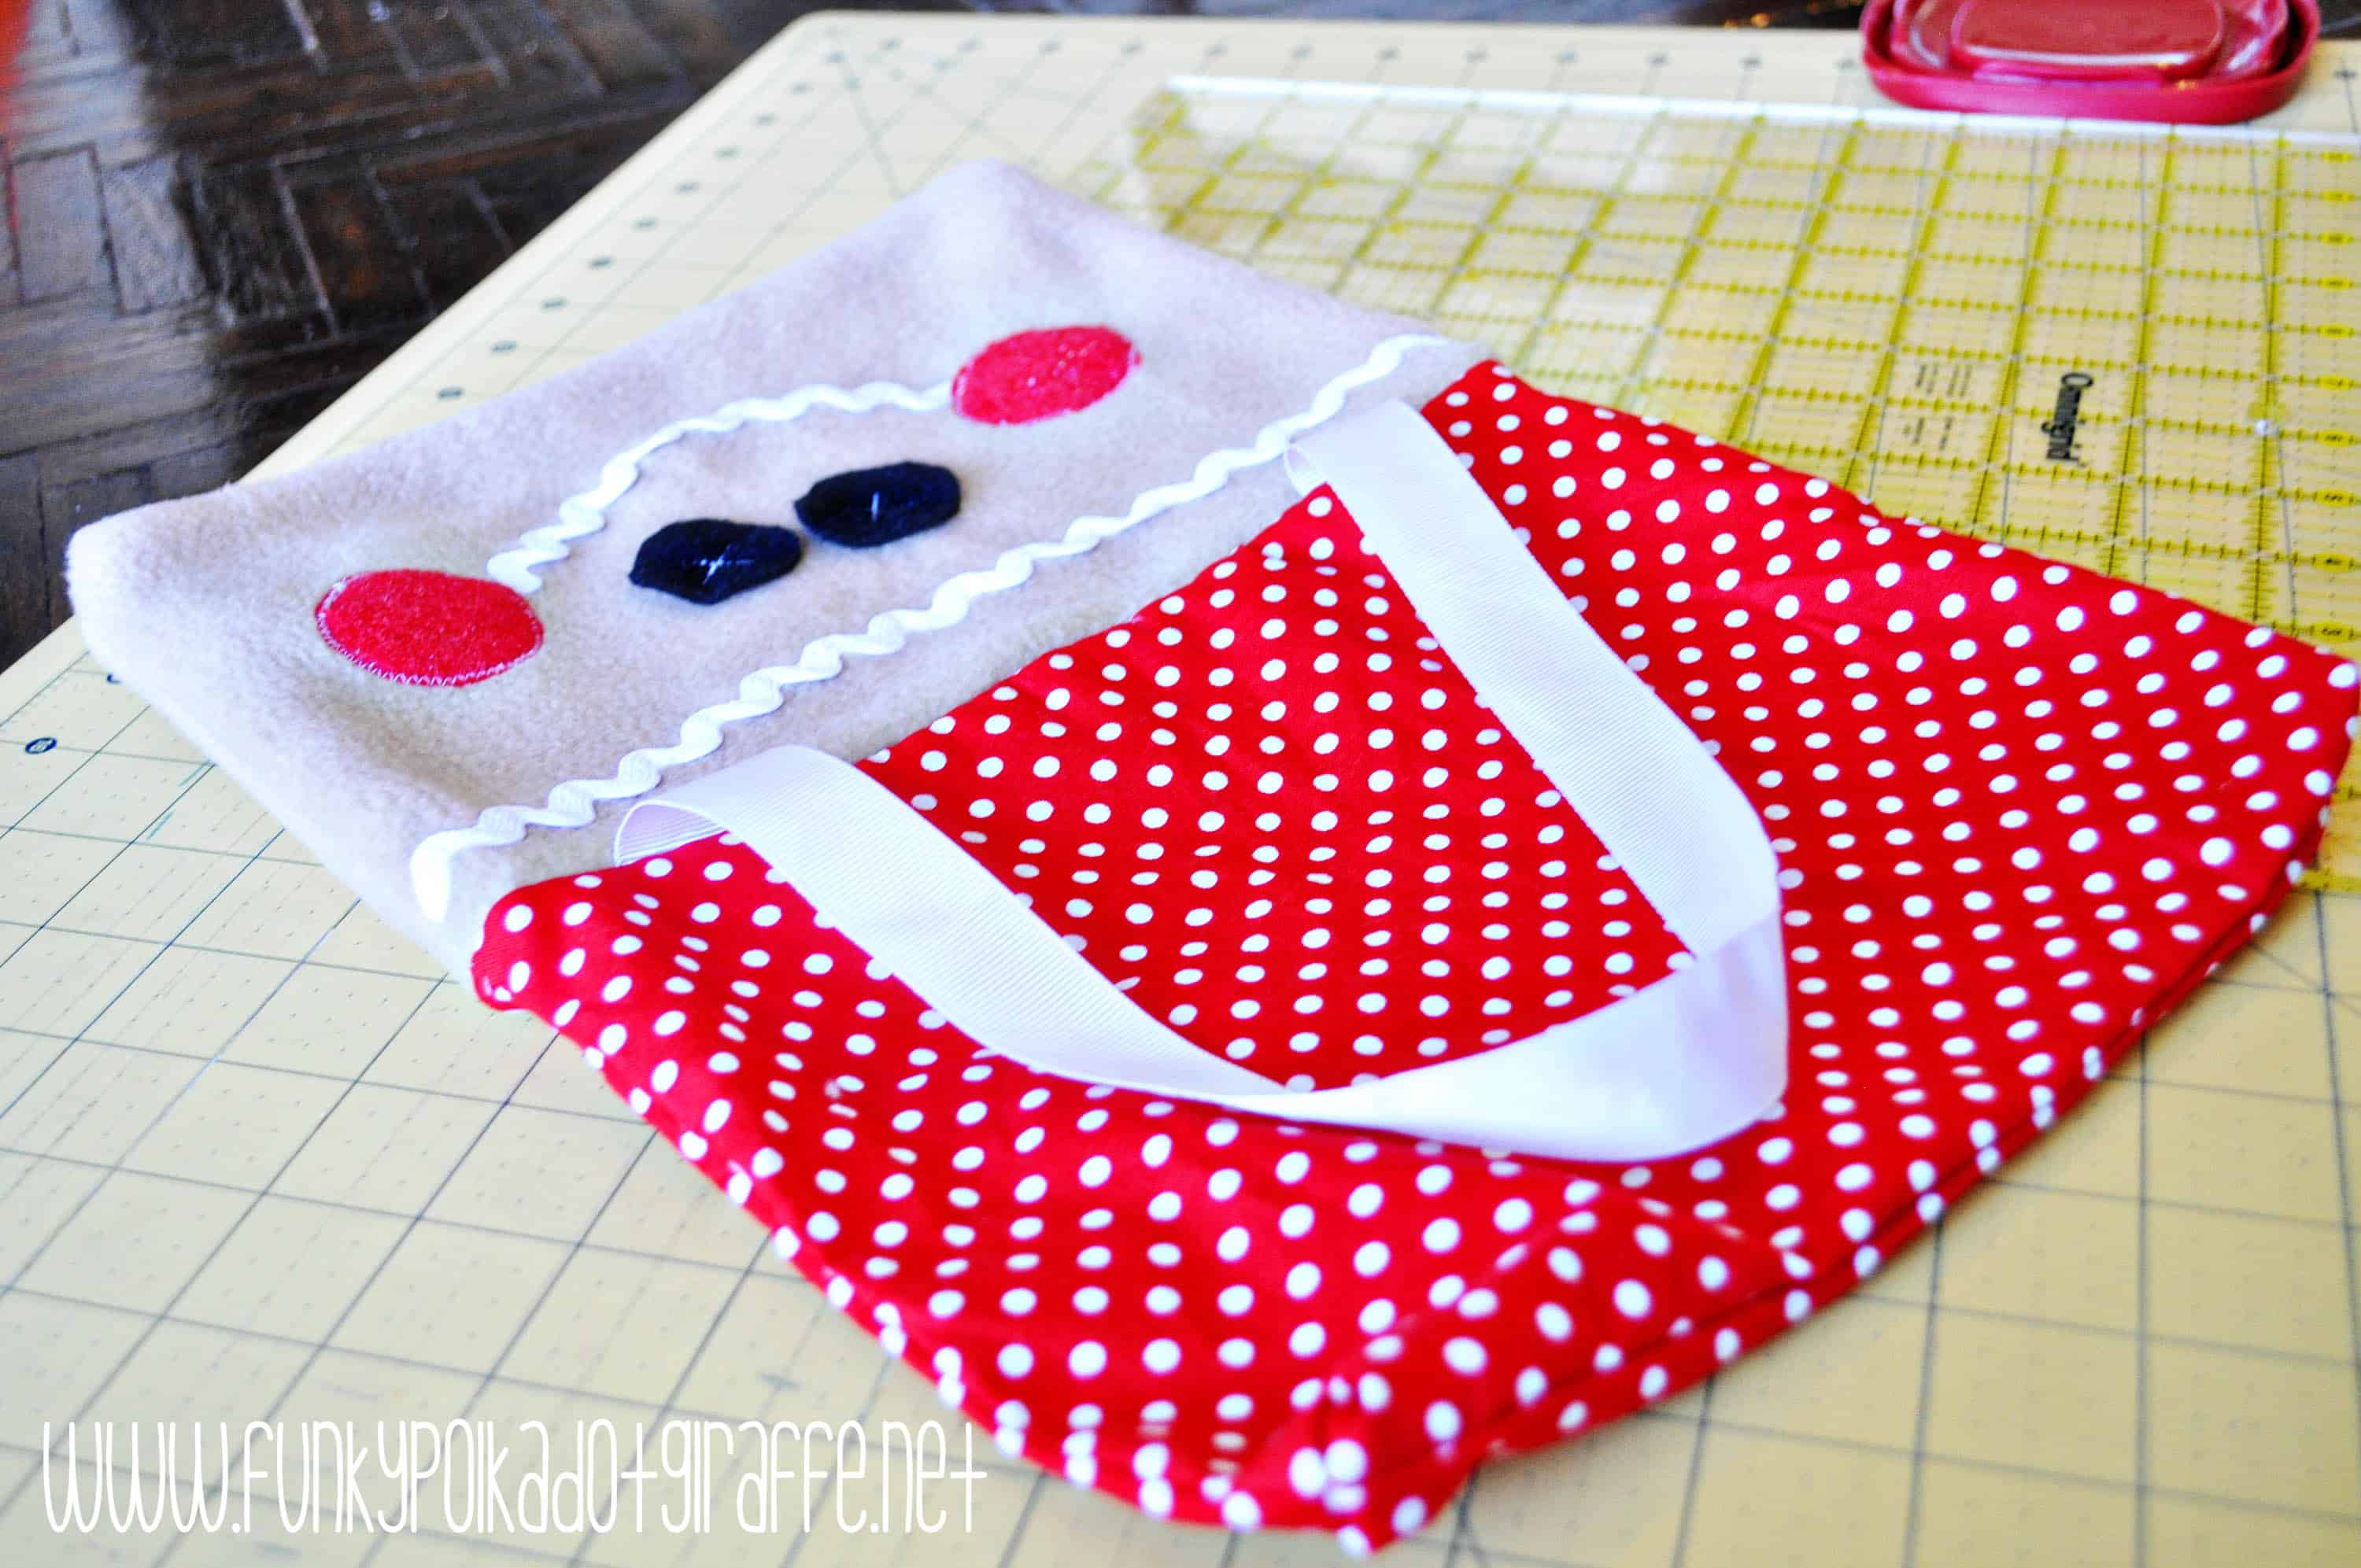
Now, we’re ready to sew the bag! Put your two fleece 9″x11″ pieces with right sides together and sew together with 3/8″ seam allowance on three sides, leaving the top open. Repeat this process with the two red pieces of cotton fabric. Then, since I like the square/boxy look on a purse, I pinch and flatten the corners and sew across about 3/8″ from the tip. If you need a better visual, I used the same technique for my Harry Potter tote bag.
Doesn’t it look so cute?! Now we’re going to put the liner and the outside of the bag together. I didn’t put the bow on until the very end, it’s just on there right now to see how it will looked finished. You’ll need your two pieces of 16″ ribbon as we are going to make them into handles for the purse. This part is tricky and you’ll end up with your bag sewn together wrong (believe me I’ve done it!) if you don’t slow down and double check that you’ve got it put together right.
Take the outside of your bag (your fleece gingerbread face piece) and turn it WRONG SIDE OUT. Take your red lining piece and turn it RIGHT SIDE OUT and slip it inside your fleece gingerbread face piece. Now, the RIGHT SIDES will be together on the INSIDE of your bag and your WRONG SIDES will be visible on the inside and outside of the bag. Pin the side seams and then tuck your ribbon handle pieces in between the RIGHT SIDES together and pin about 1″ from the side seams. Then pin all the way around – being sure to leave a 3-4″ opening for turning. I mark my start and stop with blue pins so I don’t accidentally sew the bag closed. Sew from START to STOP point (being sure to leave the opening!) with a 3/8″ seam allowance.
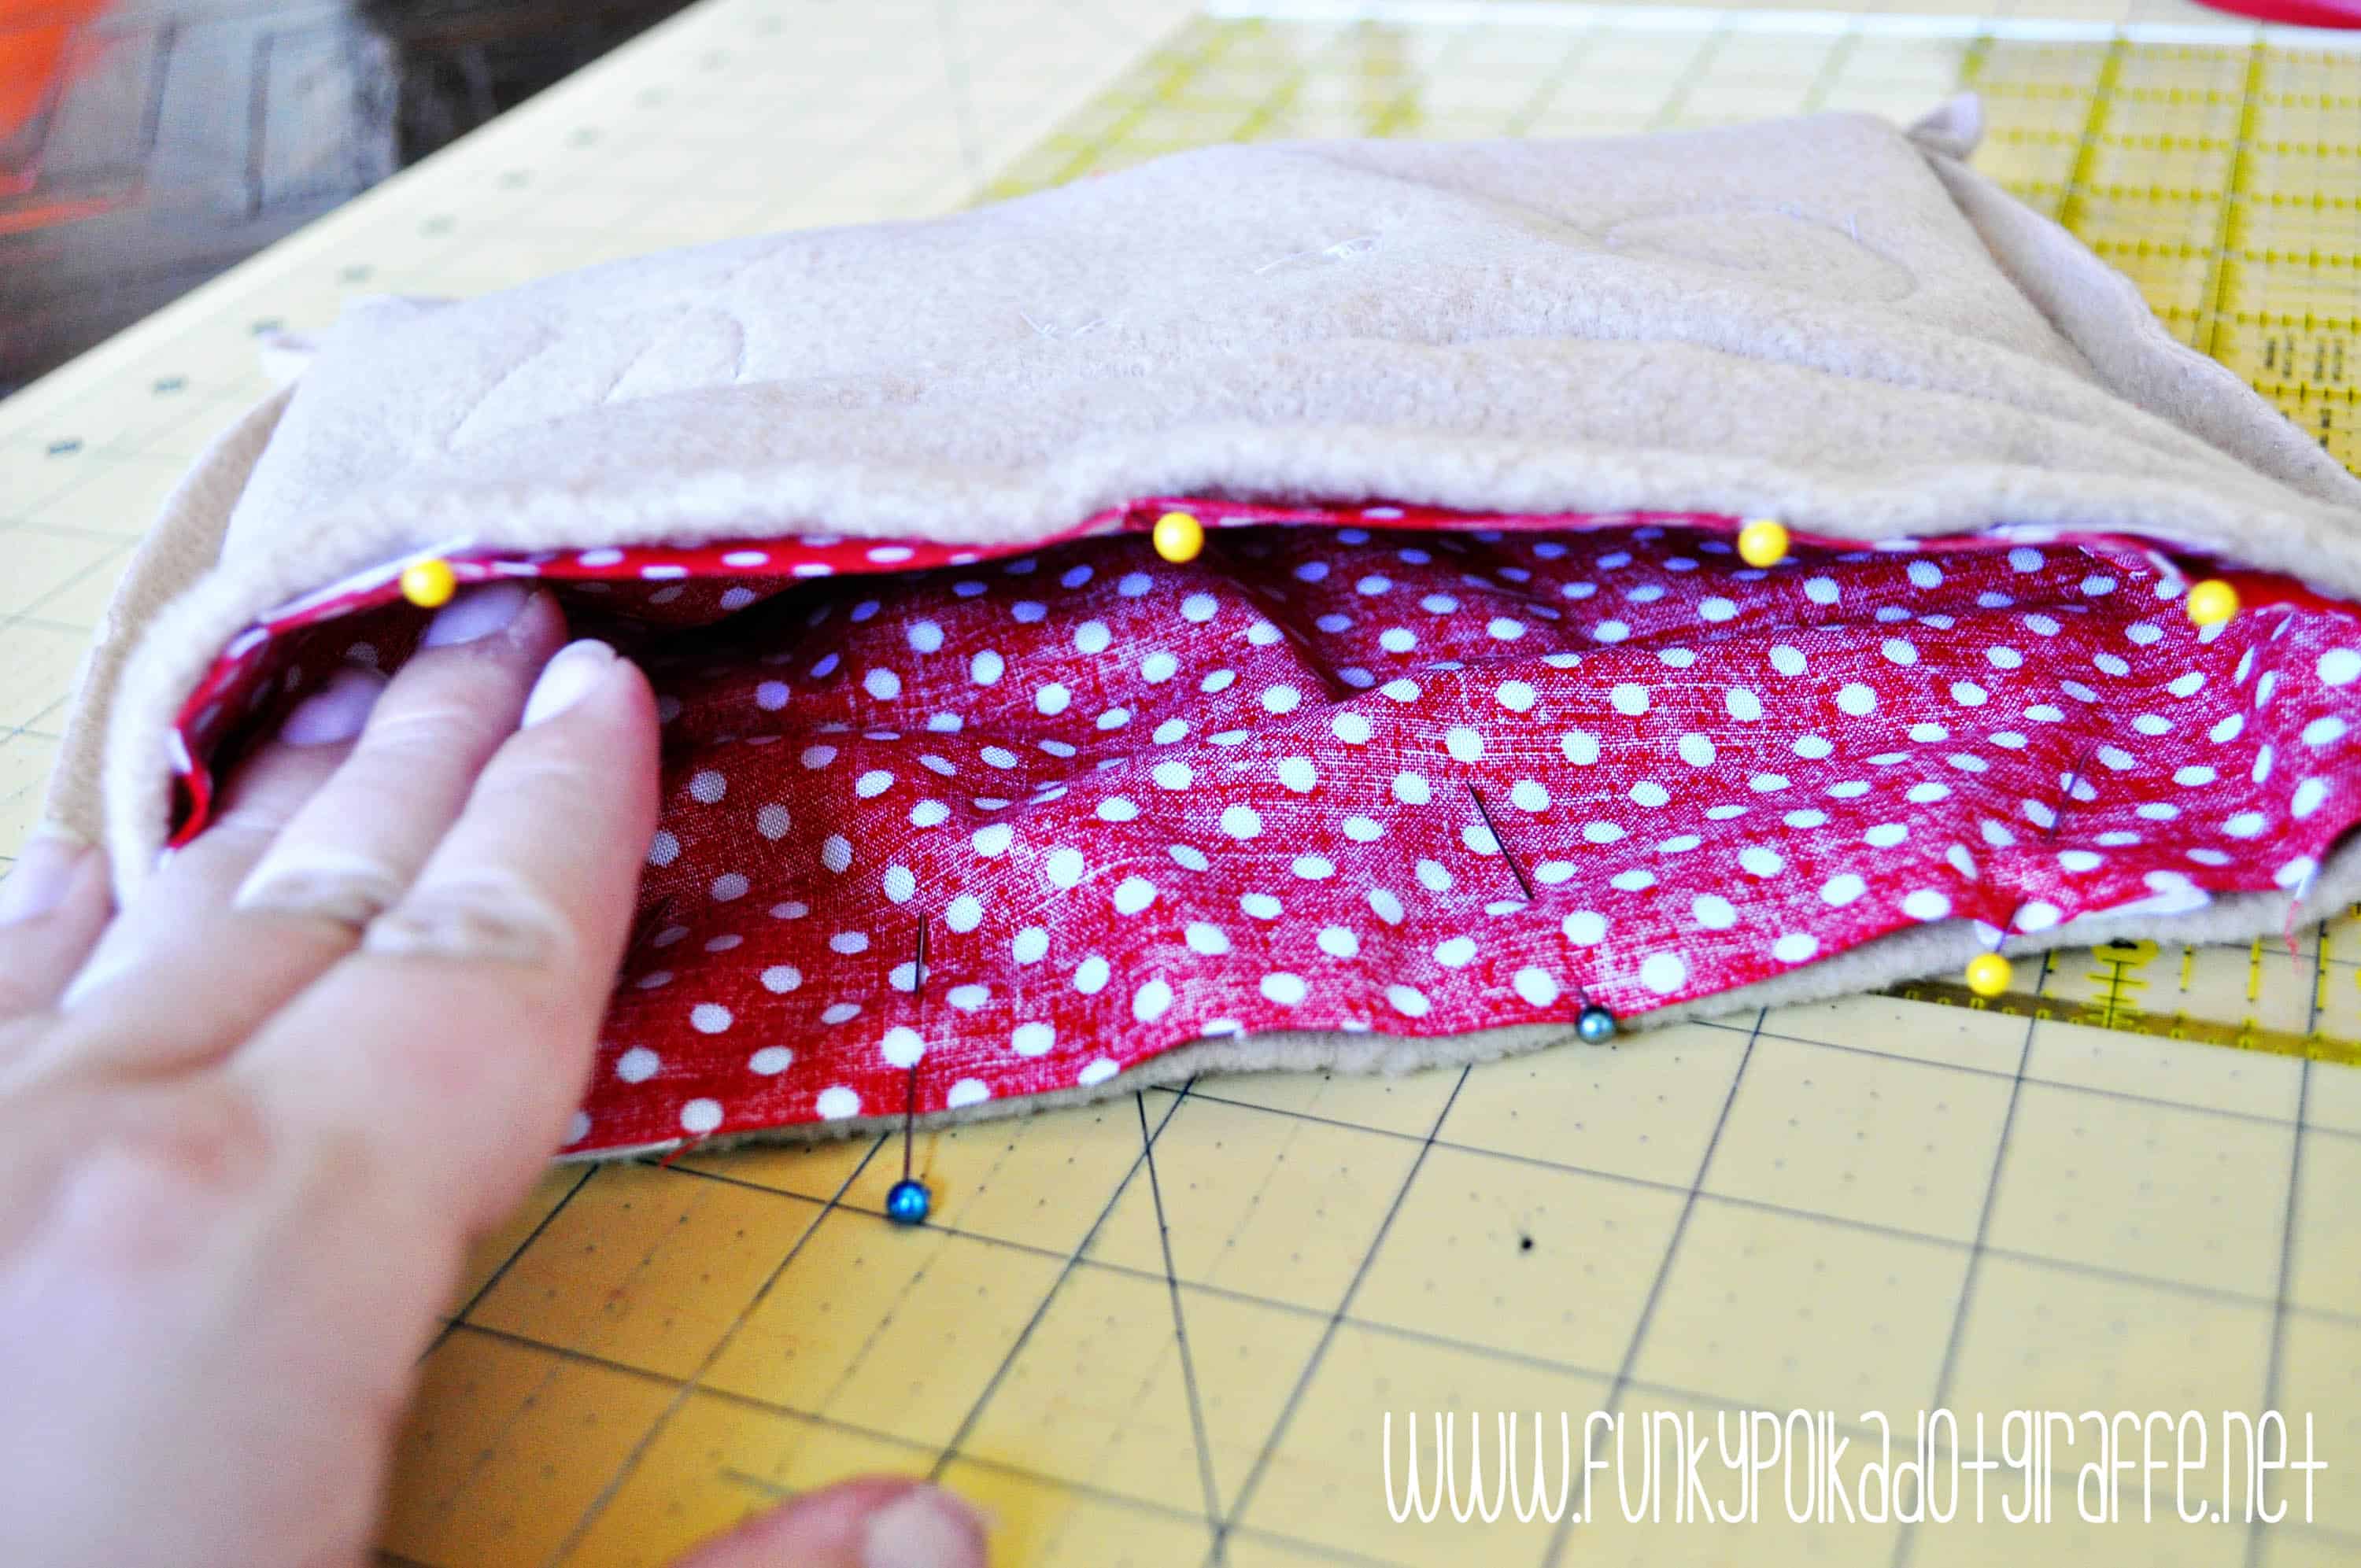
Now it’s time to flip it! Through the opening you left, pull your RIGHT SIDES out. BAM! You’re almost done. Tuck the lining back into the bag and sew the hole you left for turning closed. You can sew all the way around and make a nice finished looking topstitch, but I didn’t do that for this bag.
Now is the perfect time to either sew or glue your felt bow on. You could also use grosgrain ribbon if you want something less bulky. I liked how the felt looked with the fleece. Plus, it’s sparkly! It really was a lot of fun to put together and now I want to make some more Christmas-themed little purses for Grace to use during the next few months.
Last, you take your little purse-obsessed girl and her new gingerbread girl bag and do a little photo shoot outside of the pool while her older brother is at swim team. What? It’s not 80 degrees at your house right now? I got a lot of funny looks from passerbys to see her all dressed up in her holiday clothes, boots, and a beanie when it was just 82 degrees that afternoon. However, luckily since it was Daylight Savings this weekend, the sun was setting, and it was getting a bit chilly at 74 degrees. Hee, hee.

Thanks so much for letting me share this quick and easy gift tutorial with you! I hope your little one enjoys it as much as mine does! I’d love for you to come and catch up with me on {INSTAGRAM}, {FACEBOOK}, {TWITTER}, and {PINTEREST}!
And if you’d like some more fun and easy gift ideas that you can sew, craft or bake please visit me at Funky PolkaDot Giraffe! I also have lots of cute FREE PRINTABLES! Come and visit!

Sa
{Rainbow Ruffle Skirt} {Harry Potter Tote Bag} {Fancy Turkey Headband}
ve
Save
Save
Save
Save
The post Little Girl Gingerbread Purse appeared first on Skip To My Lou.