
Learn how to draw a rose with these step by step instructions. With just a few strokes you will be drawing beautiful roses! This easy to follow tutorial makes it perfect for beginners and even kids!
After you have drawn this beautiful flower try one of these things to draw. There are some great drawing tutorials!

How to Draw a Rose
Print of this step by step guide and keep it handy while you make your rose drawing.
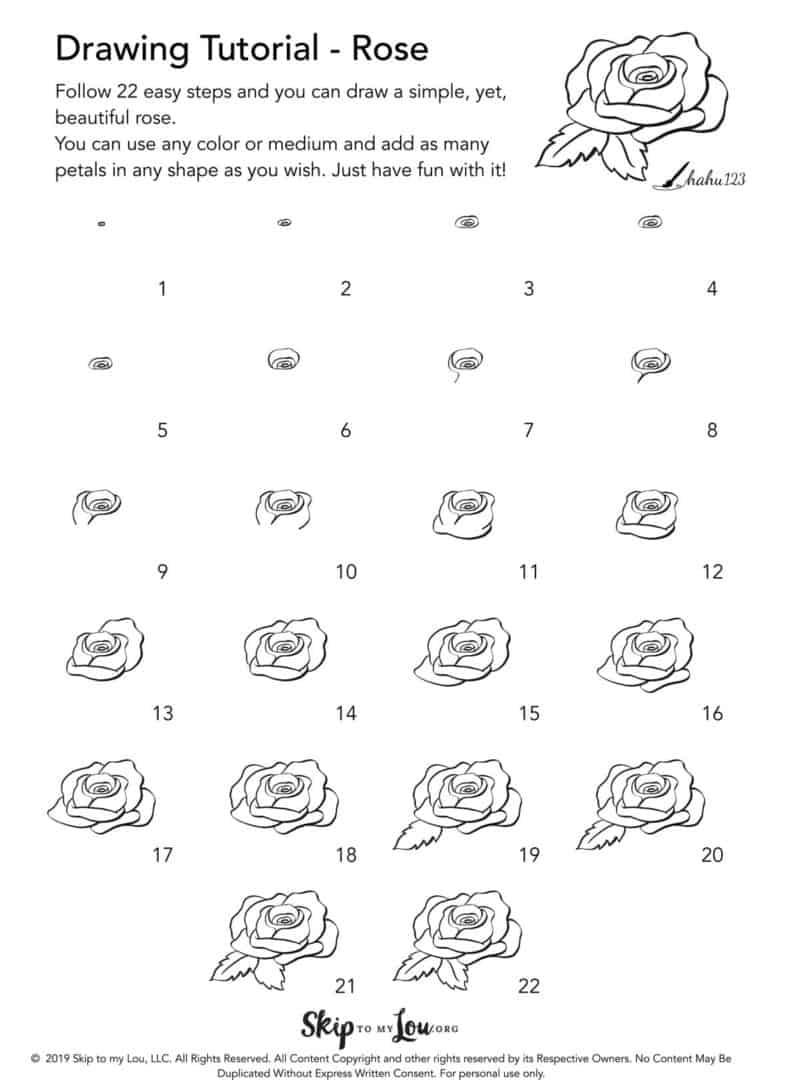
Rose Drawing Step by Step Tutorial
- Start by drawing an oval shape
- Draw a small oval around the beginning oval, making the bottom of the second oval even with the first.
- Draw an oval around these
- Draw another oval around the tiny shape, making the bottom of the second oval even with the second.
- Continue making ovals
- Step 7 Draw a curved line down from the outer oval on the left side
- Repeat on the other side.
- Following the drawing guide and video continue drawing rose petals
- Step 19 you are ready to add leaves.
- Add a line down the center of each leaf
- If you would like a rose with a stem, add two lines at the bottom of the rose.
Watch this video and you will see learning how to draw a rose is easy. This realistic rose can be sketched with pencils.
Rose Color Meanings
When finished use colored pencils for coloring the rose. Did you know that different colored roses have different meanings? There seems to be a wide range of opinions of this but here are a few ideas:
- Red – love
- Burgundy – beauty
- White – marriage
- Dark Pink – appreciation
- Yellow – friendship
- Pink – grace & elegance
- Peach – gratitude
- Orange – enthusiasm
- Salmon – desire
- Ivory – thoughtfulness
- Purple – enchantment
Let me know if you found this tutorial helpful.
The post How to Draw a Rose appeared first on Skip To My Lou.